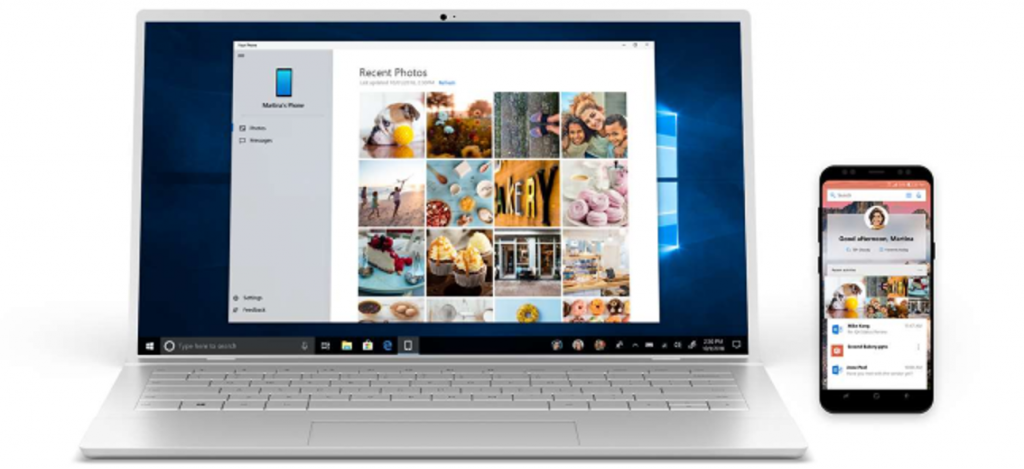
If you’re on a computer and you get a text on your phone, wouldn’t it be great if you could reply without picking it up? Yes, it would, and there are great apps and services that enable just that.
Whether you use Apple or Android, you can send and receive text messages on a Mac, Windows PC, or Chromebook. Keep reading to determine which option works best for you.
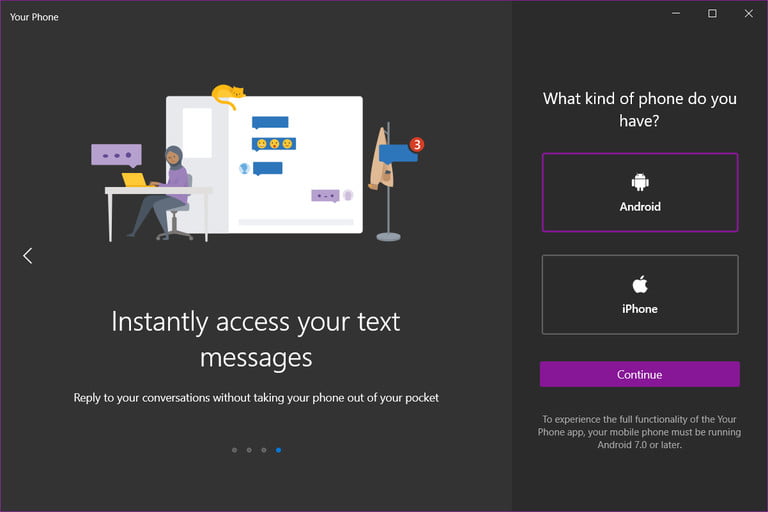
This solution is primarily for those who use a Windows 10 PC and an Android phone. It relies on Microsoft’s built-in Your Phone app, introduced in the April 2018 Update, and its Your Phone Companion app for Android. This combination allows users to send and recieve texts in Windows 10, receive Android notifications in the Action Center, and access pictures stored on the phone. The Your Phone app also supports iPhones, but its limited to forwarding webpages from Microsoft Edge for iOS. iPhone support does not include text messaging, notifications, and photo access.
This method requires the following:
- Android 7.0 Nougat or newer.
- Windows 10 April 2018 Update or newer.
Step 1: Click the Start button to locate and launch the Your Phone app. Alternatively, type “your” into the taskbar’s search field and select the resulting app.
Step 2: The app opens on your screen. Select Android and then click Continue as shown above.
Step 3: Switch to your Android phone and install the Your Phone Companion app from Google Play.
On certain Samsung phones, tap on Link to Windows instead and sign in to a Microsoft Account. The Windows 10 PC should appear if the link is successful.
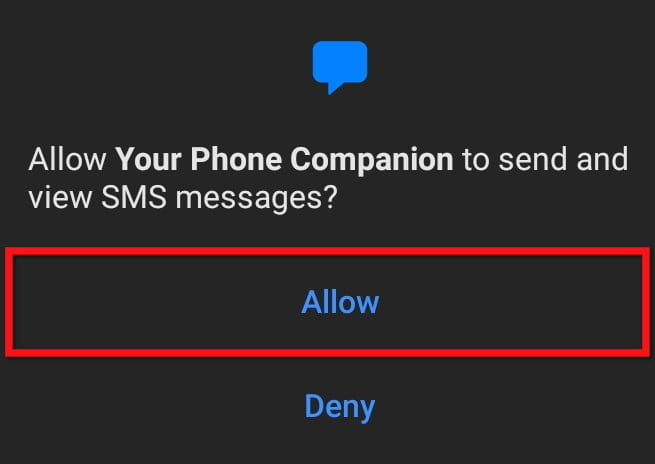
Step 4: Follow the instruction on the Android phone: Sign in using the same Microsoft Account used on the Windows 10 PC, enable permissions, and so on. When finished, tap the My PC is Ready link.
Step 5: Tap the Allow button on the following screen to enable the connection between phone and PC.
Step 6: Tap Done on the following screen.
Step 7: On the Windows 10 PC, the Android phone should appear in the app’s top-left corner. Click the Get Started button followed by the Set Up button on the next screen.
Step 8: Confirm the Bluetooth pairing on both devices.
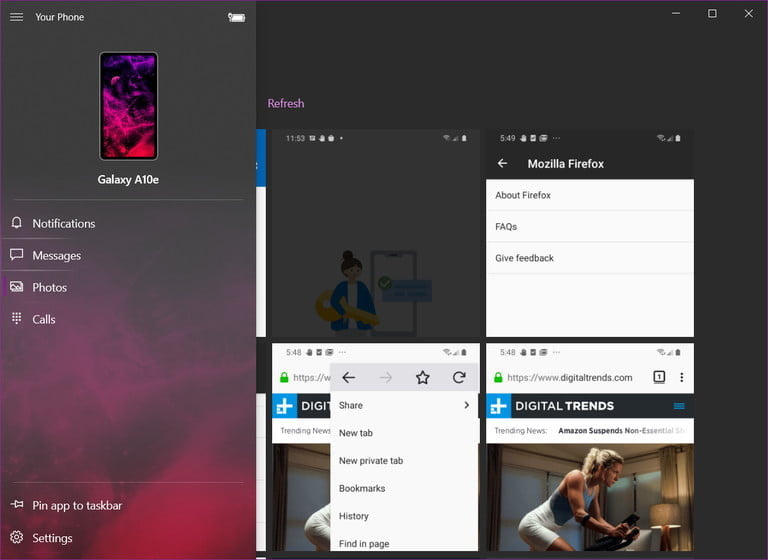
With the two devices paired, tap the Messages icon on the toolbar to the left to send and receive messages in Windows 10 using an Android phone. This method does not work when using third-party apps as the primary text messaging platform. Note that users can also retrieve photos from the phone, make calls, and receive notifications.
How to send texts via iMessage (iOS, iPadOS, MacOS)
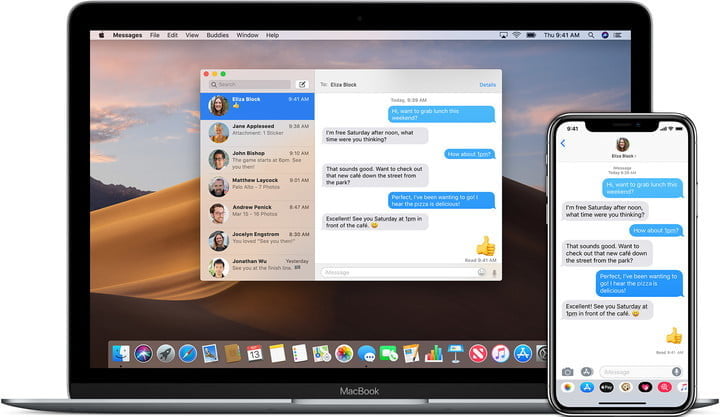
This method typically requires an Apple device with a cellular connection. However, because it also relies on Apple’s iMessage format, users can bypass a cellular connection when messaging another Apple device.
The iPhone supports two types of messages. Users can send iMessages over the internet via WiFi or mobile data, which are highlighted by blue bubbles and only received on Apple devices. iPhones also send standard SMS and MMS messages over the typical wireless carrier plan, which are received by non-Apple devices and highlighted by green bubbles.
This is an important distinction, as Apple device owners without a cellular connection or associated phone number can still send messages to other Apple device owners. All they need is an Apple ID.
However, to text all contacts with and without an Apple device, users need an Apple device with a cellular plan. Here, we assume the user has an iPhone, although an iPad with a SIM card and compatible mobile plan works, too.
Step 1: Make sure your iPhone is logged in with your Apple ID.
Step 2: Open the Settings app and scroll down to select Messages.
Step 3: Toggle the iMessage switch on the following screen to enable this service.
Step 4: Tap Send & Receive and verify the phone number and email accounts that can be associated with sending and receiving iMessages. Also, select a phone number and/or email address that can start a new conversation.
Step 5: On all other iOS and iPadOS devices, repeat the previous steps. Be sure that they are connected to the same Wi-Fi network.
Step 6: On a Mac, open the Messages app. Click Messages on the menu bar followed by Preferences on the drop-down menu. When the pop-up appears, click the iMessage tab and sign in with the same Apple ID.
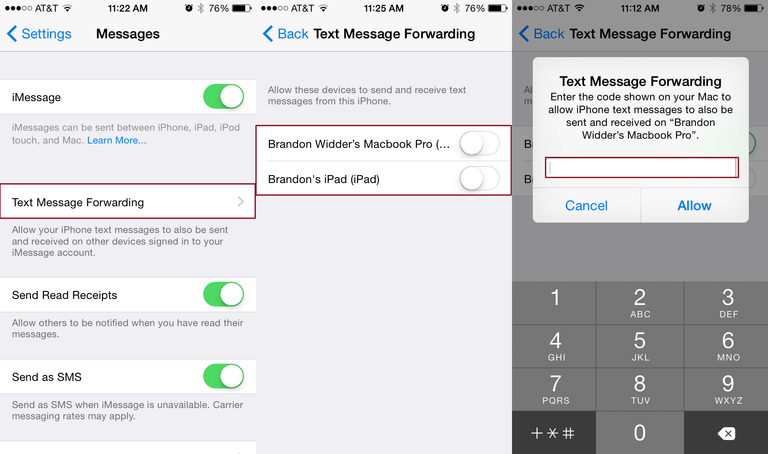
Step 7: Move back to the iPhone and return to Messages in the Settings app. Once there, tap Text Message Forwarding. This portion deals with SMS and MMS texting.
Step 8: Toggle the switch directly right of the Apple device to which you want to send and receive SMS and MMS messages.
Each time a device is enabled, you must enter its displayed six-digit confirmation code on the iPhone. Doing so will confirm that you want to send and receive SMS and MMS messages on your Apple device. You may or may not need to enter a confirmation code, depending on the setup.
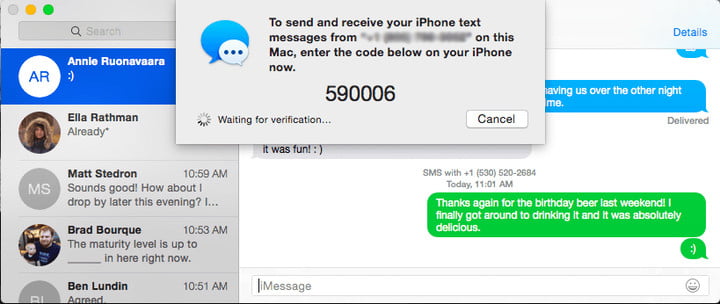
To send a message on any Apple device, click or tap the Pencil icon located above the contact list. After that, enter your desired recipient(s) and compose the message as normal.
Keep in mind that the standard text message limit of 160 characters still applies even when using iMessages. A text longer than 160 characters will likely count as two for billing purposes, or more depending on its length.
Remember, iMessages are “free” when devices are connected to Wi-Fi. On the flip side, they count against your monthly data allotment when using 4G or 5G, so be sure to stay connected to the local wireless network when possible. Standard SMS and MMS messages are piped through your wireless mobile carrier.
How to send texts via Android Messages (Android and PC)
This method works great for Android phone users and it doesn’t matter what kind of computer you use: You just need a browser and the Android Messages app. Android Messages lets Android smartphone owners text straight from a web interface, no matter what device they’re using. It works on desktops, laptops, or even Apple devices. You do have to set Android Messages as the default app on your phone, so make sure to do so before getting started.
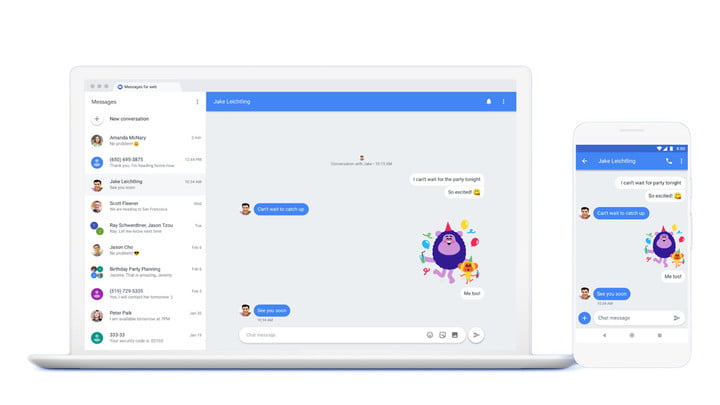
Step 1: Go to the Android Messages homepage.
Step 2: Open the Android Messages application on your phone.
Step 3: Tap on the three dots menu icon and select Messages for Web.
Step 4: Tap the blue QR Code Scanner button and use your handset to scan the QR code from the Android Messages homepage. If you aren’t sure how, here’s a guide on using QR codes with today’s smartphones. This will link your device and your browser, and you’ll see messages and contacts appear on your other device as they synchronize.

Step 5: Use the web interface to chat with friends and family just like you’d do on an Android smartphone.
You won’t have to rescan your QR code every time you use the platform because you can sync up your devices. To do this, select Yes when the web interface asks if you want it to remember your computer.
Sending texts via email
In addition, you can also transfer SMS messages with the email client on your phone. You can practice this technique to send and receive text messages even if you don’t own a cell phone. Keep in mind that you’ll need to know what cell phone carrier your recipient uses to share the message successfully. If you aren’t 100% confident, you can find out the answer here.

