
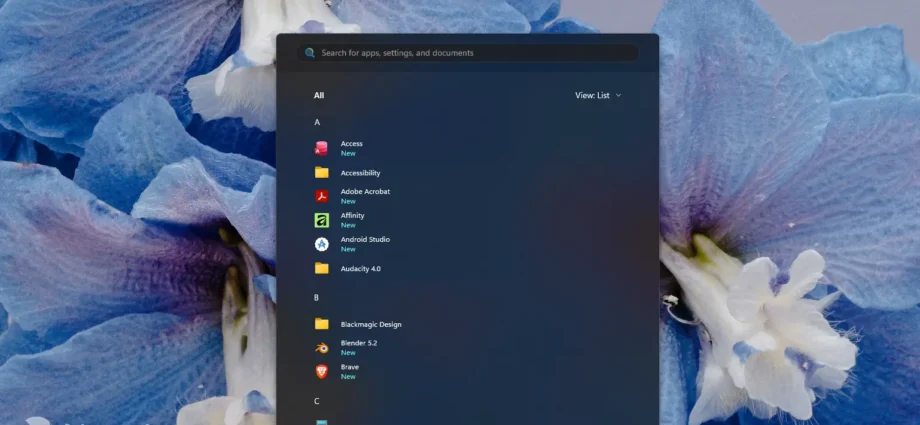
Use the latest Start menu customization options that Microsoft recently introduced in Windows 11 to drastically declutter it.
People have had various opinions about Windows 11’s Start menu. While some like the new design language, a lot of users also feel like the Start menu is more cluttered and packed with unnecessary sections than it needs to be. But to be fair, the Windows 11 Start menu has changed quite a bit over the past few years, and Microsoft has added numerous options that can make the Start menu in Windows 11 more appealing to users.
A solid chunk of changes arrived just recently, with the August 2026 preview update, KB5120998, which brought the ability to resize the Start menu, independently show or hide different sections, and even remove your name and profile picture from the bottom of the menu. As a matter of fact, the main purpose of this guide is to show you these recently introduced Start menu options.
So, if you haven’t played around with the Start menu settings in a while, now is probably a good time to revisit them. You can strip away quite a bit of clutter and make the Start menu feel a lot cleaner than it does by default.
To begin customizing the Start menu, go to Settings > Personalization > Start. This is where we’ll do most of the work.
Make the Start menu smaller and remove sections you don’t use
One of the easiest ways to reduce clutter is to shrink the Start menu itself. Microsoft now lets you choose between Small, Large, and Automatic sizes. Click the Start menu size option and choose one of the sizes offered. If you choose the Small size, it will shrink the entire Start menu, but it won’t change the layout. The Start menu will literally become smaller, with smaller icons, text, etc.
The more useful addition, though, is the ability to hide individual Start menu sections. Microsoft now lets you independently show or hide Pinned, Recent, and All, so you don’t have to keep parts of the Start menu you never actually use. This is definitely one of the most welcome changes, especially considering how many users complained about the old Recommended section.
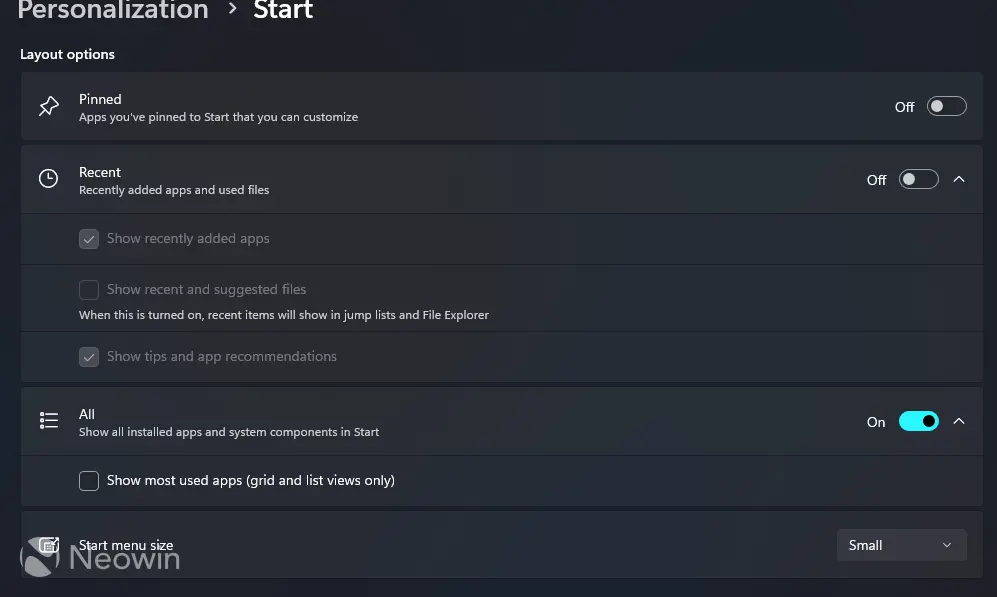
You can keep or disable the sections you want to see in the Start menu. For example, if you never use the Recent section, you can simply remove it. If you mainly launch apps through Search and don’t care about browsing the full app list, you can hide All as well. My preference is disabling Pinned and Recent, and leaving All, but you can play around and see what you like the most.
If you leave the All option on, you can also show the most used apps in a separate section. To enable this, click the down arrow next to the All option in Settings, and toggle Show most used apps (grid and list views only).
Clean up your pinned apps and shortcuts
If you decide to leave the pinned apps in the Start menu, they can become another source of clutter. This is especially true if you’ve been using the same Windows installation for a while and have accumulated a bunch of apps you barely open.
The easiest thing to do is simply right-click anything you don’t need and select Unpin from Start. For apps you actually want to keep, you can organize them into folders instead of leaving every icon sitting separately. Organizing pinned apps is done in the Start menu itself, not in Settings. Here’s how to do it:
- Drag one pinned app on top of another.
- Windows will automatically create a folder.
- Drag additional apps into the folder if you want.
- Click the folder and rename it.
You could, for example, group all your gaming apps, utilities, work tools, or media apps together. Microsoft specifically supports grouping pinned items into folders as a way to reduce clutter.