Do you have an external drive that’s no longer showing up when plugged in? Here’s how to fix it.
There are times when it can be a godsend to have an external hard drive around to back up important files from your Windows 11 computer. It can also be useful to have an external drive around to expand your storage capacity in general, whether that’s a larger external HDD or a more pocketable USB-C flash drive. When storage drives work, they’re an essential part of keeping our computers running smoothly. But, like any electronics, external hard drives have their fair share of issues. Their portable nature means that they get thrown around more than normal hard drives, which can be bad news for the electronics inside. This may be less of a concern now that external SSDs are more affordable, but any external drive can run into issues that can cause it to stop showing up in Windows. Here’s how to get that drive working again.
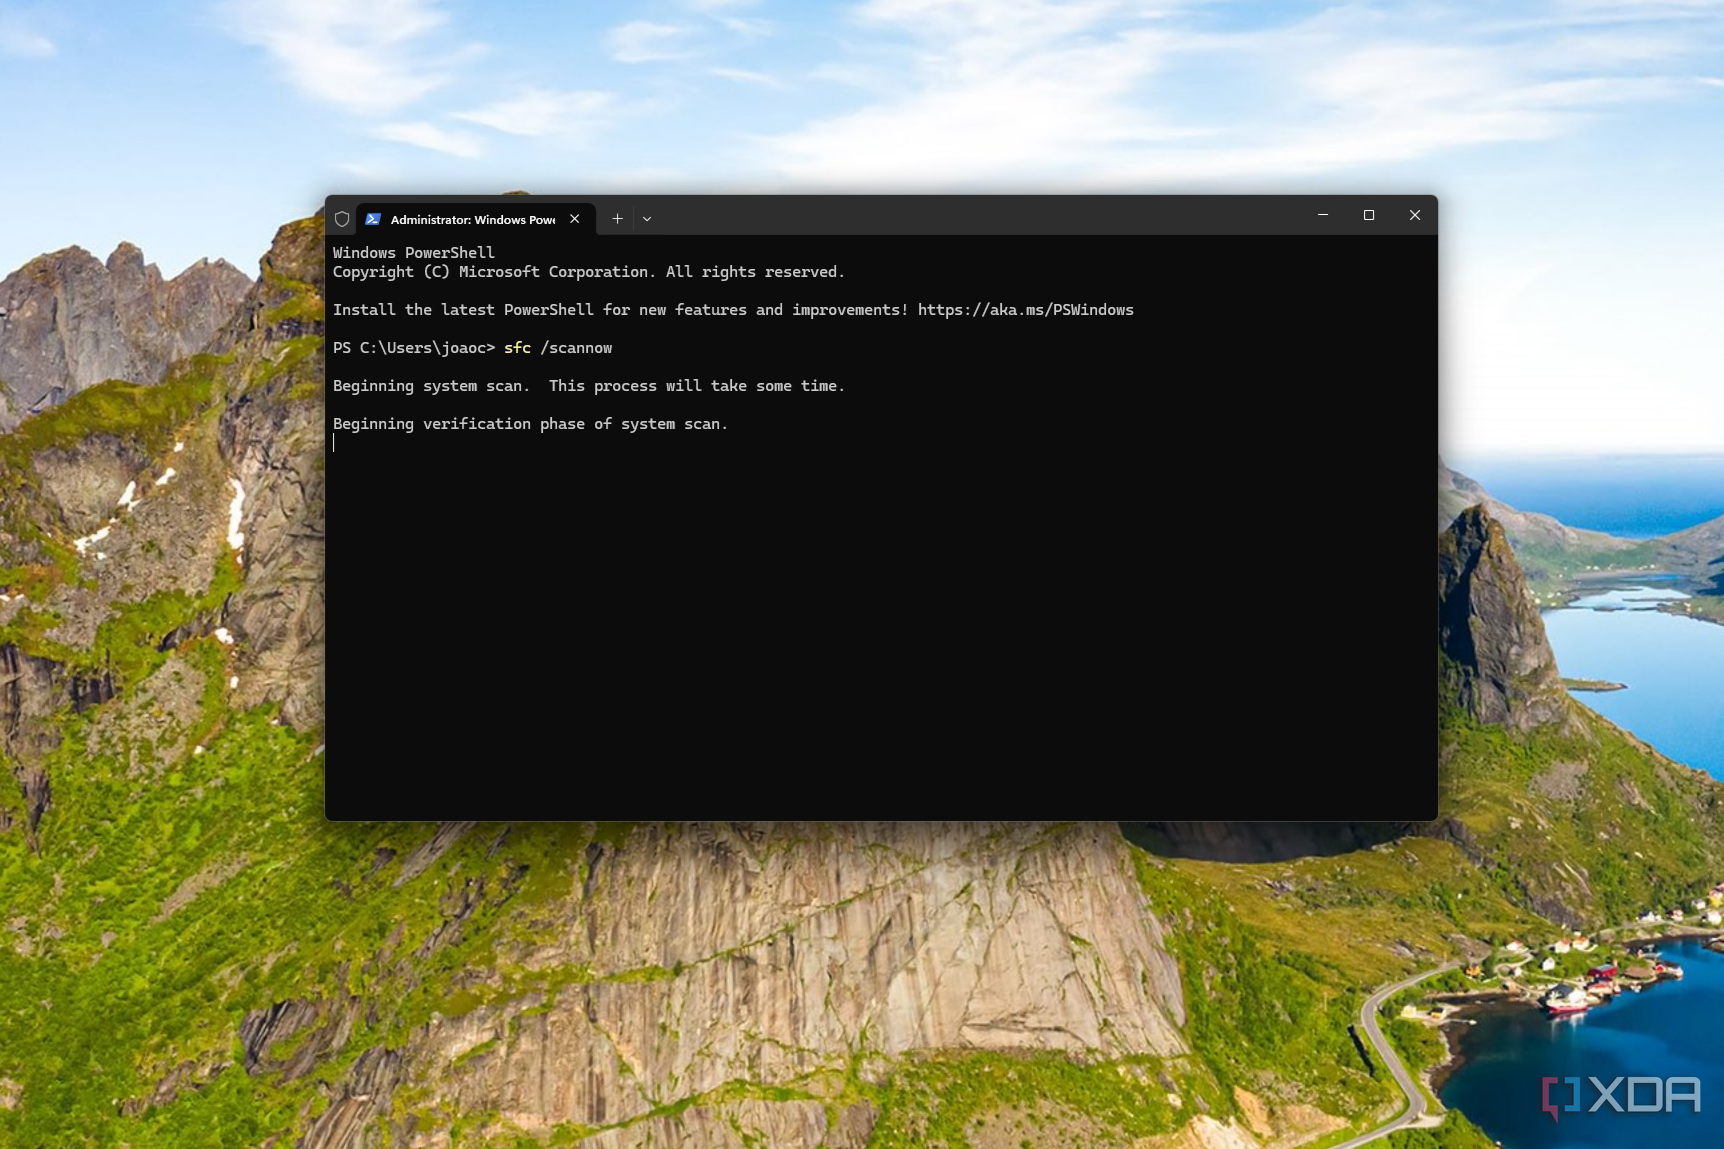
Having some issues with your Windows install? It may be failing, but you can try to fix it using the SFC and DISM tools built into Windows.
Check physical connections
Power, cables, and another computer if possible
Source: Western Digital
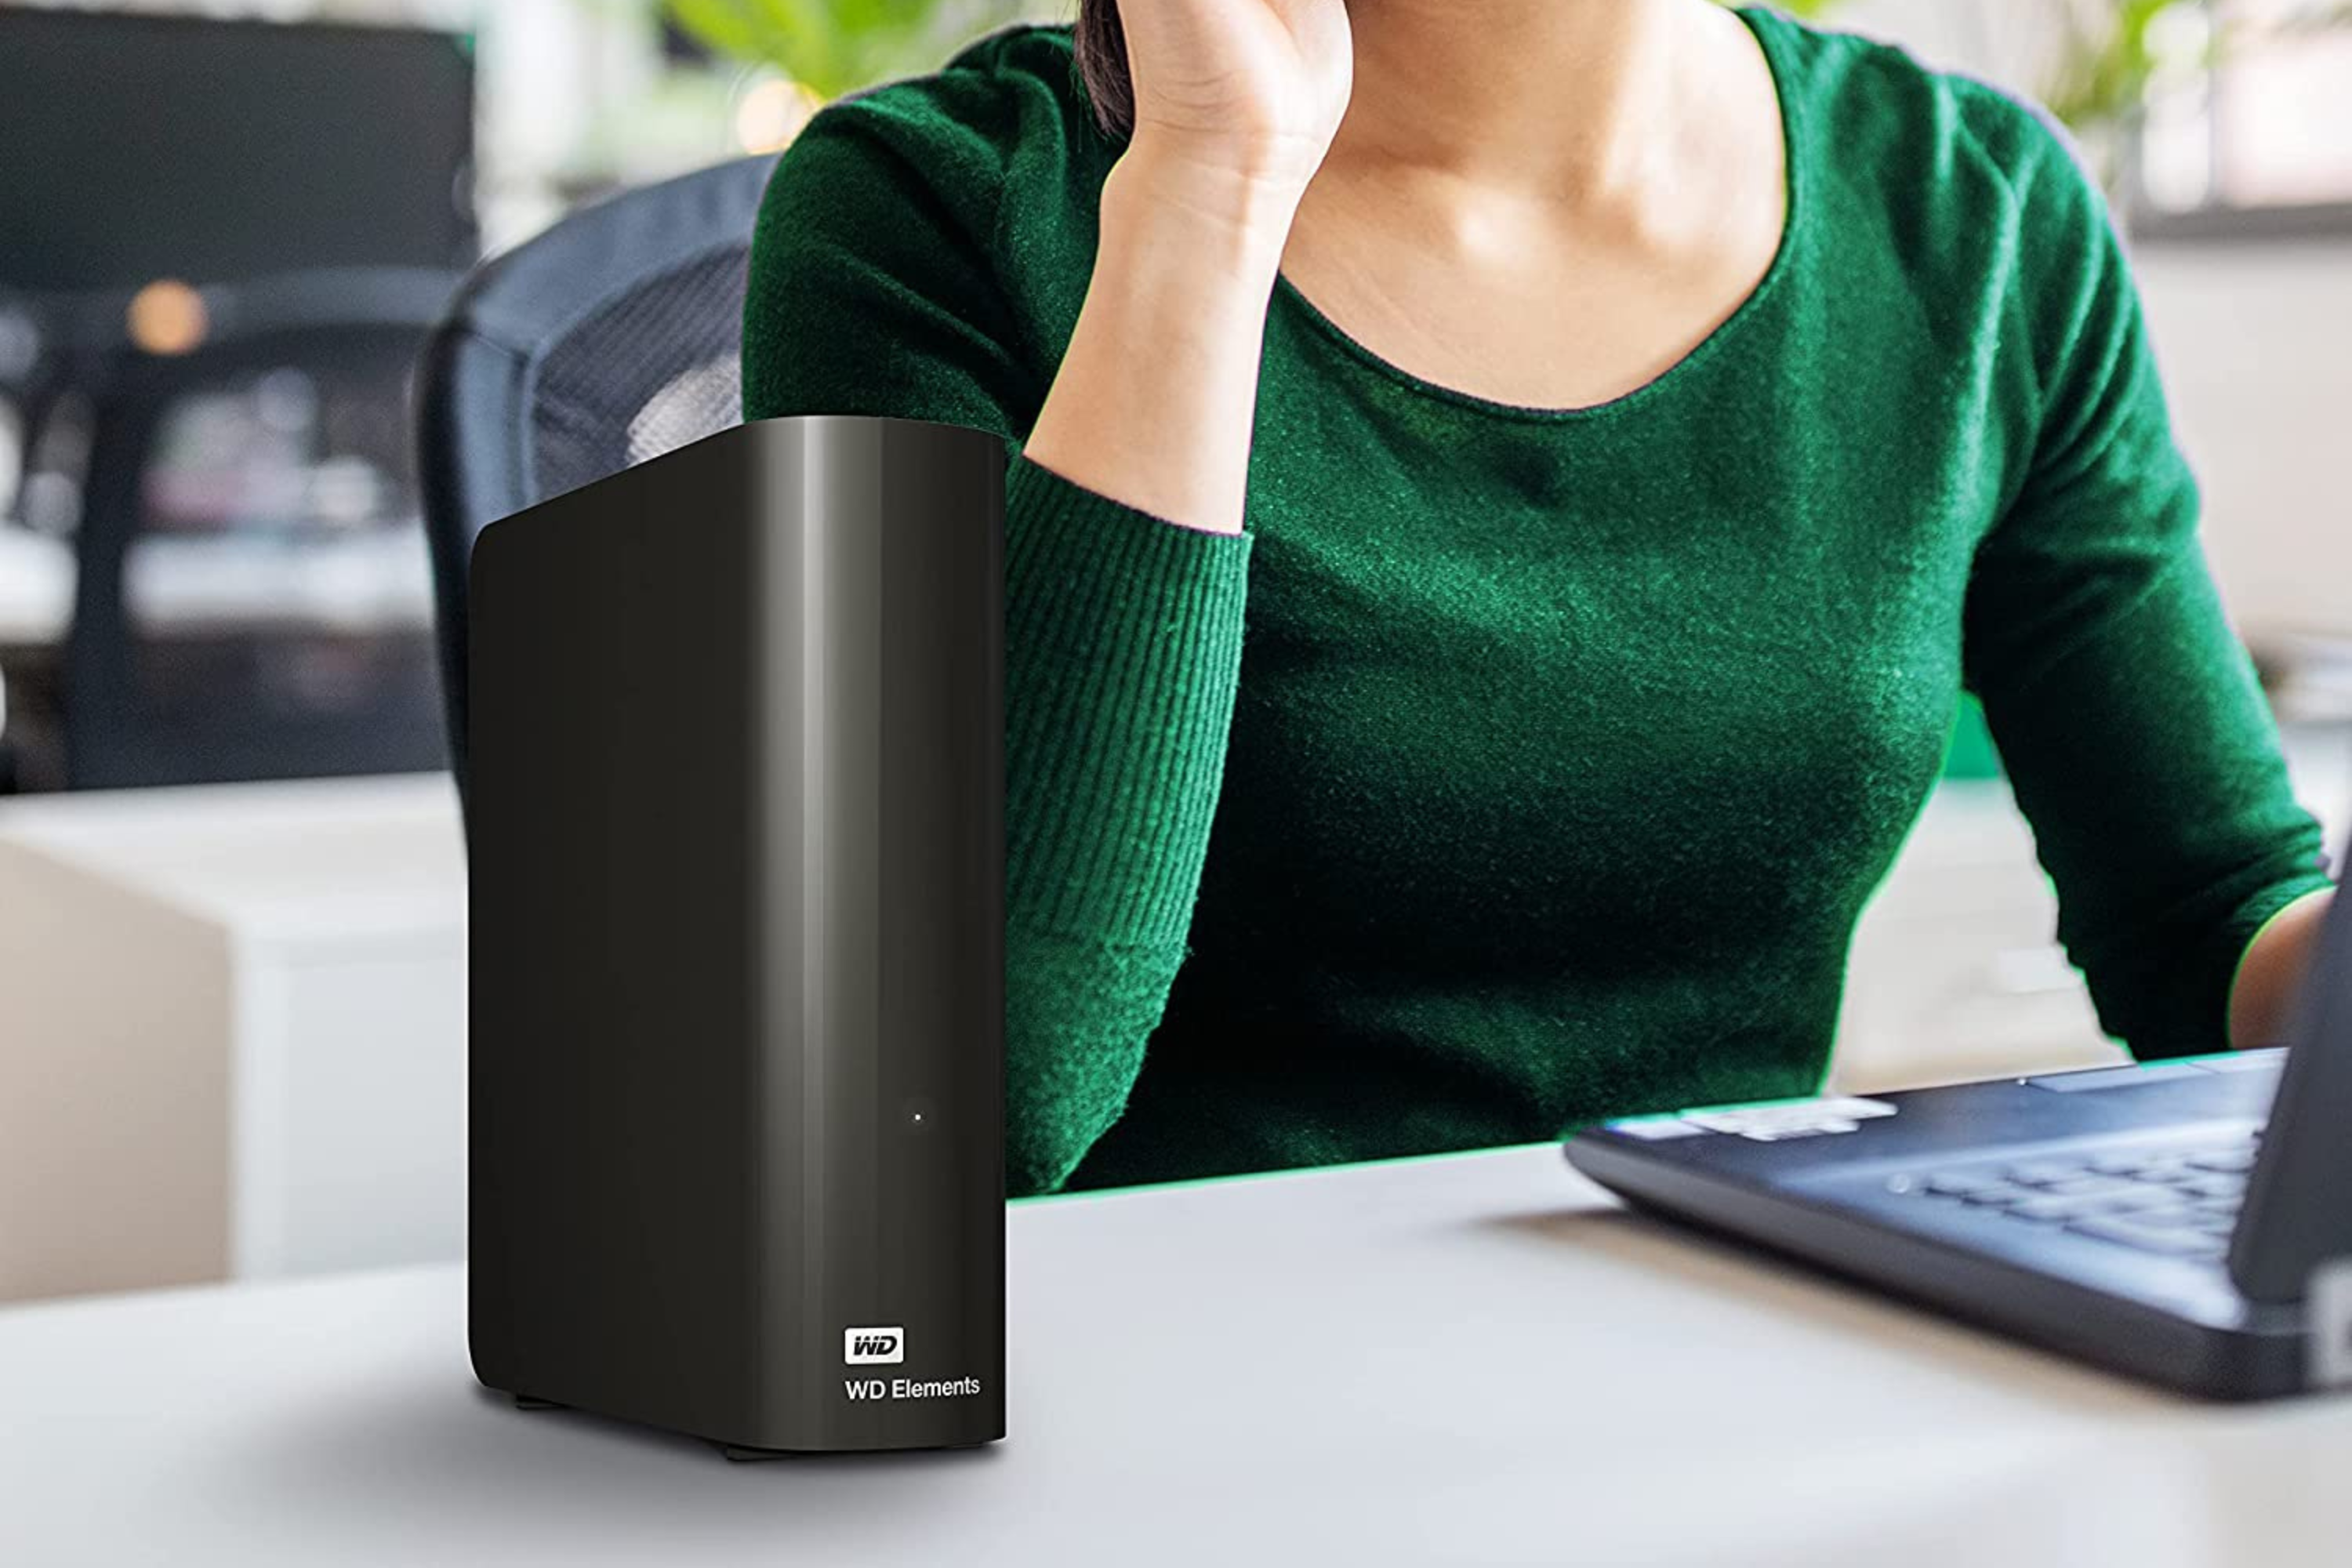
The first thing to check with any external drive when Windows doesn’t recognize it is the power source. Larger external drives often have a supplementary power cable, and some also have a physical power switch. If you have this type of drive, the power cable could be the reason it isn’t showing up in Windows, so try using another power outlet, paying attention to any indicator lights on the external drive’s enclosure or the hum of movement inside the drive. Also, try a different power cable if possible, to rule out issues. Some drives come with a USB cable with two plugs, so make sure you use the one that came with it, so it gets the power that it needs.
Some USB-powered drives also have indicator lights, and it’s one of the features I look for when I want to buy a new USB drive. This is because the flashing indicator light tells me that the drive is getting power, and that it’s working on some level, so there is another issue which is preventing it from mounting.
If you’re not getting any indication of its presence on your Windows PC, and you have a second computer around, try plugging the external drive into that one. There’s always a chance that the USB port on your computer could be the reason the drive is not showing up in File Manager. If you don’t have a second computer, try a different USB port on your computer, or one from the front I/O panel if it was plugged into the rear, or vice versa. And, of course, check the cable connections between the drive and the computer to make sure they are snug.
Also, check Disk Management as the next step if you are using it on another computer, because it may not be showing up because it doesn’t have a volume that Windows can read.
Check Disk Management
When you plug an external drive into a Windows computer, it should detect it and add a link to the drive in File Explorer. If it’s not doing that, the first thing to check is Disk Management to see if Windows is even seeing the drive at all.
- Right-click on the Start icon, and select Disk Management from the list.
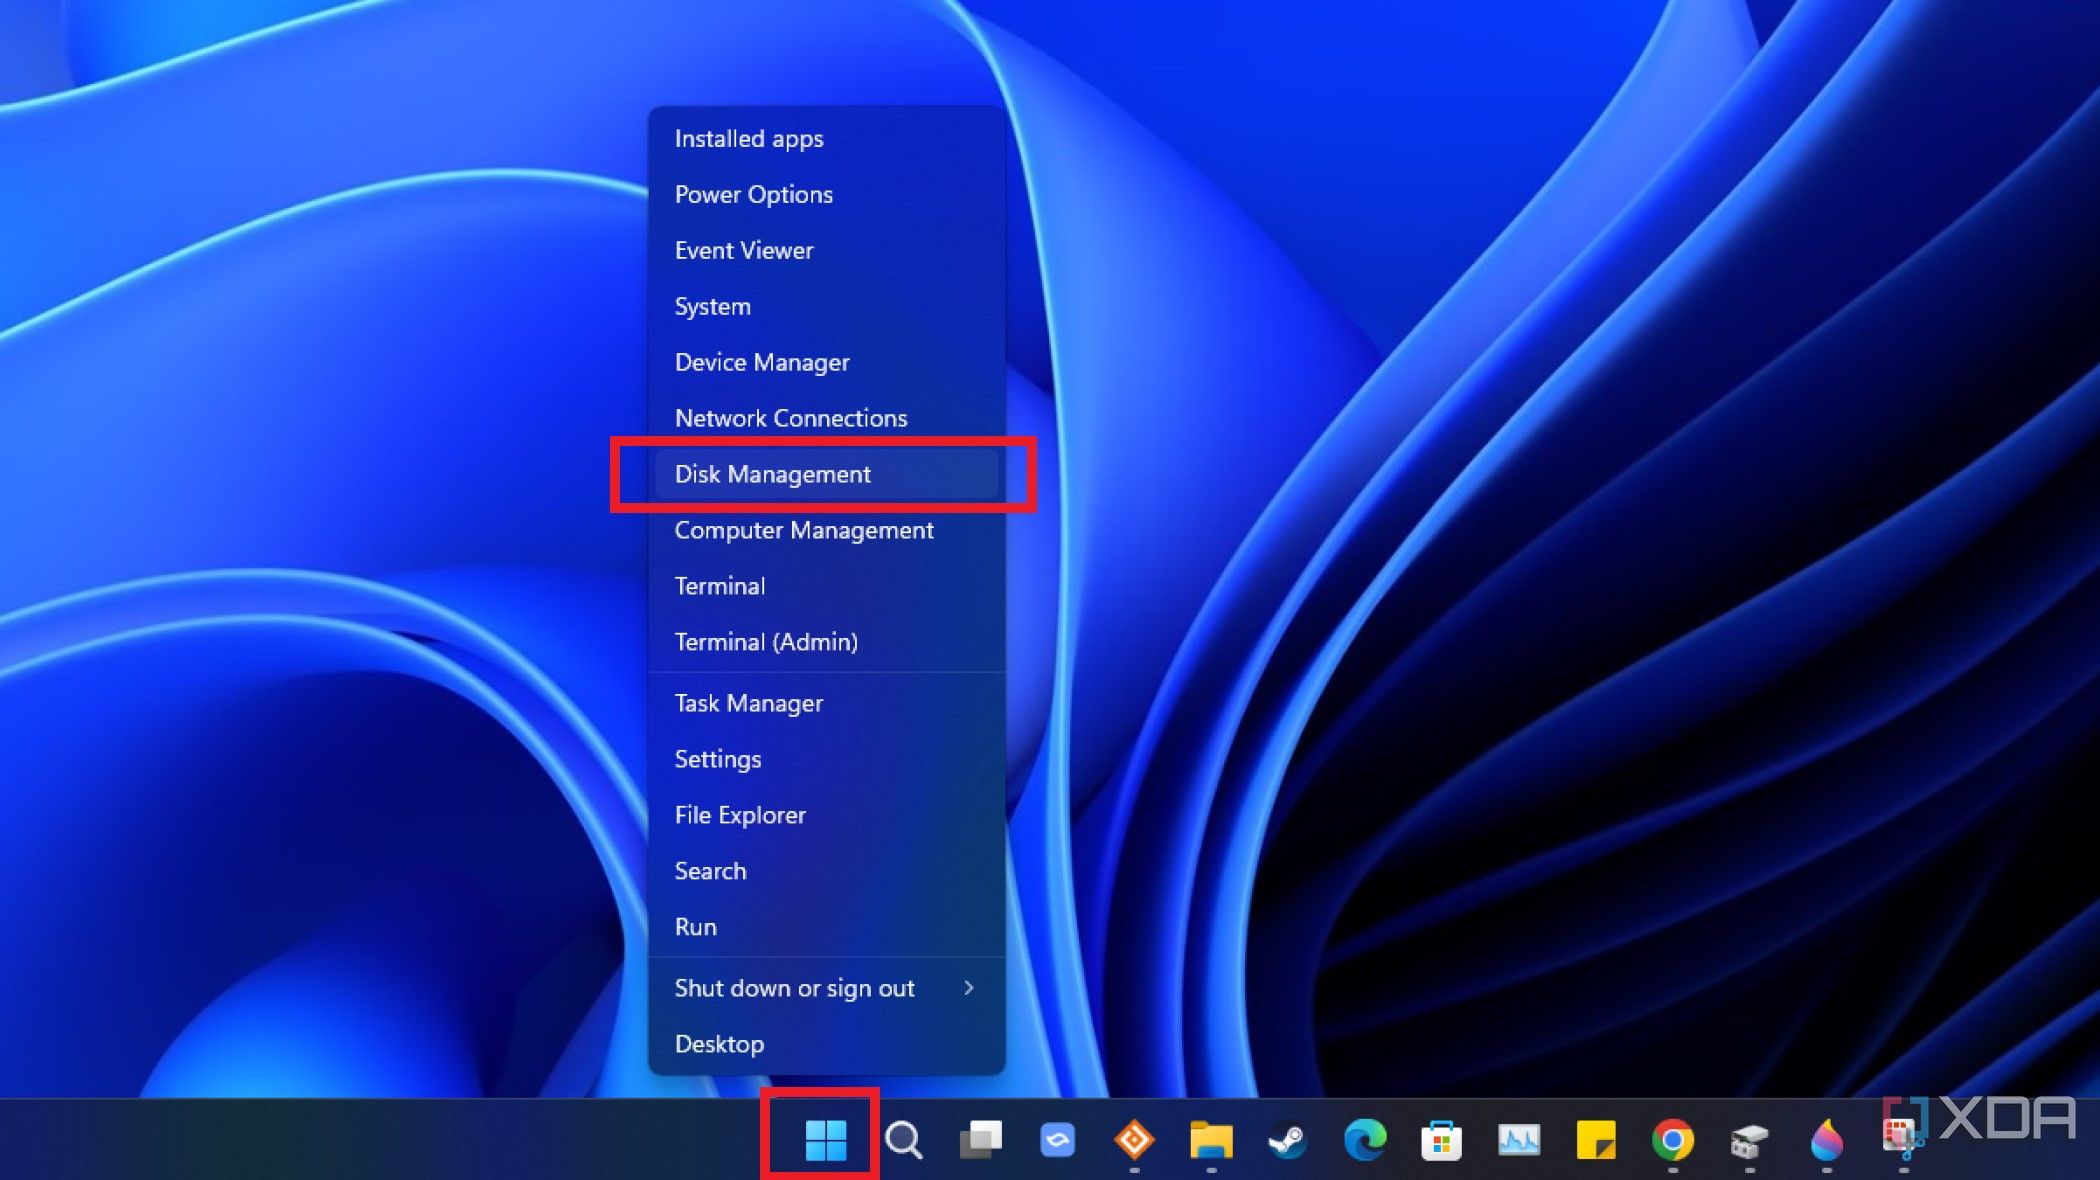
- Scroll through the disks to see if your external drive is showing. In the example below, it’s drive letter G:.
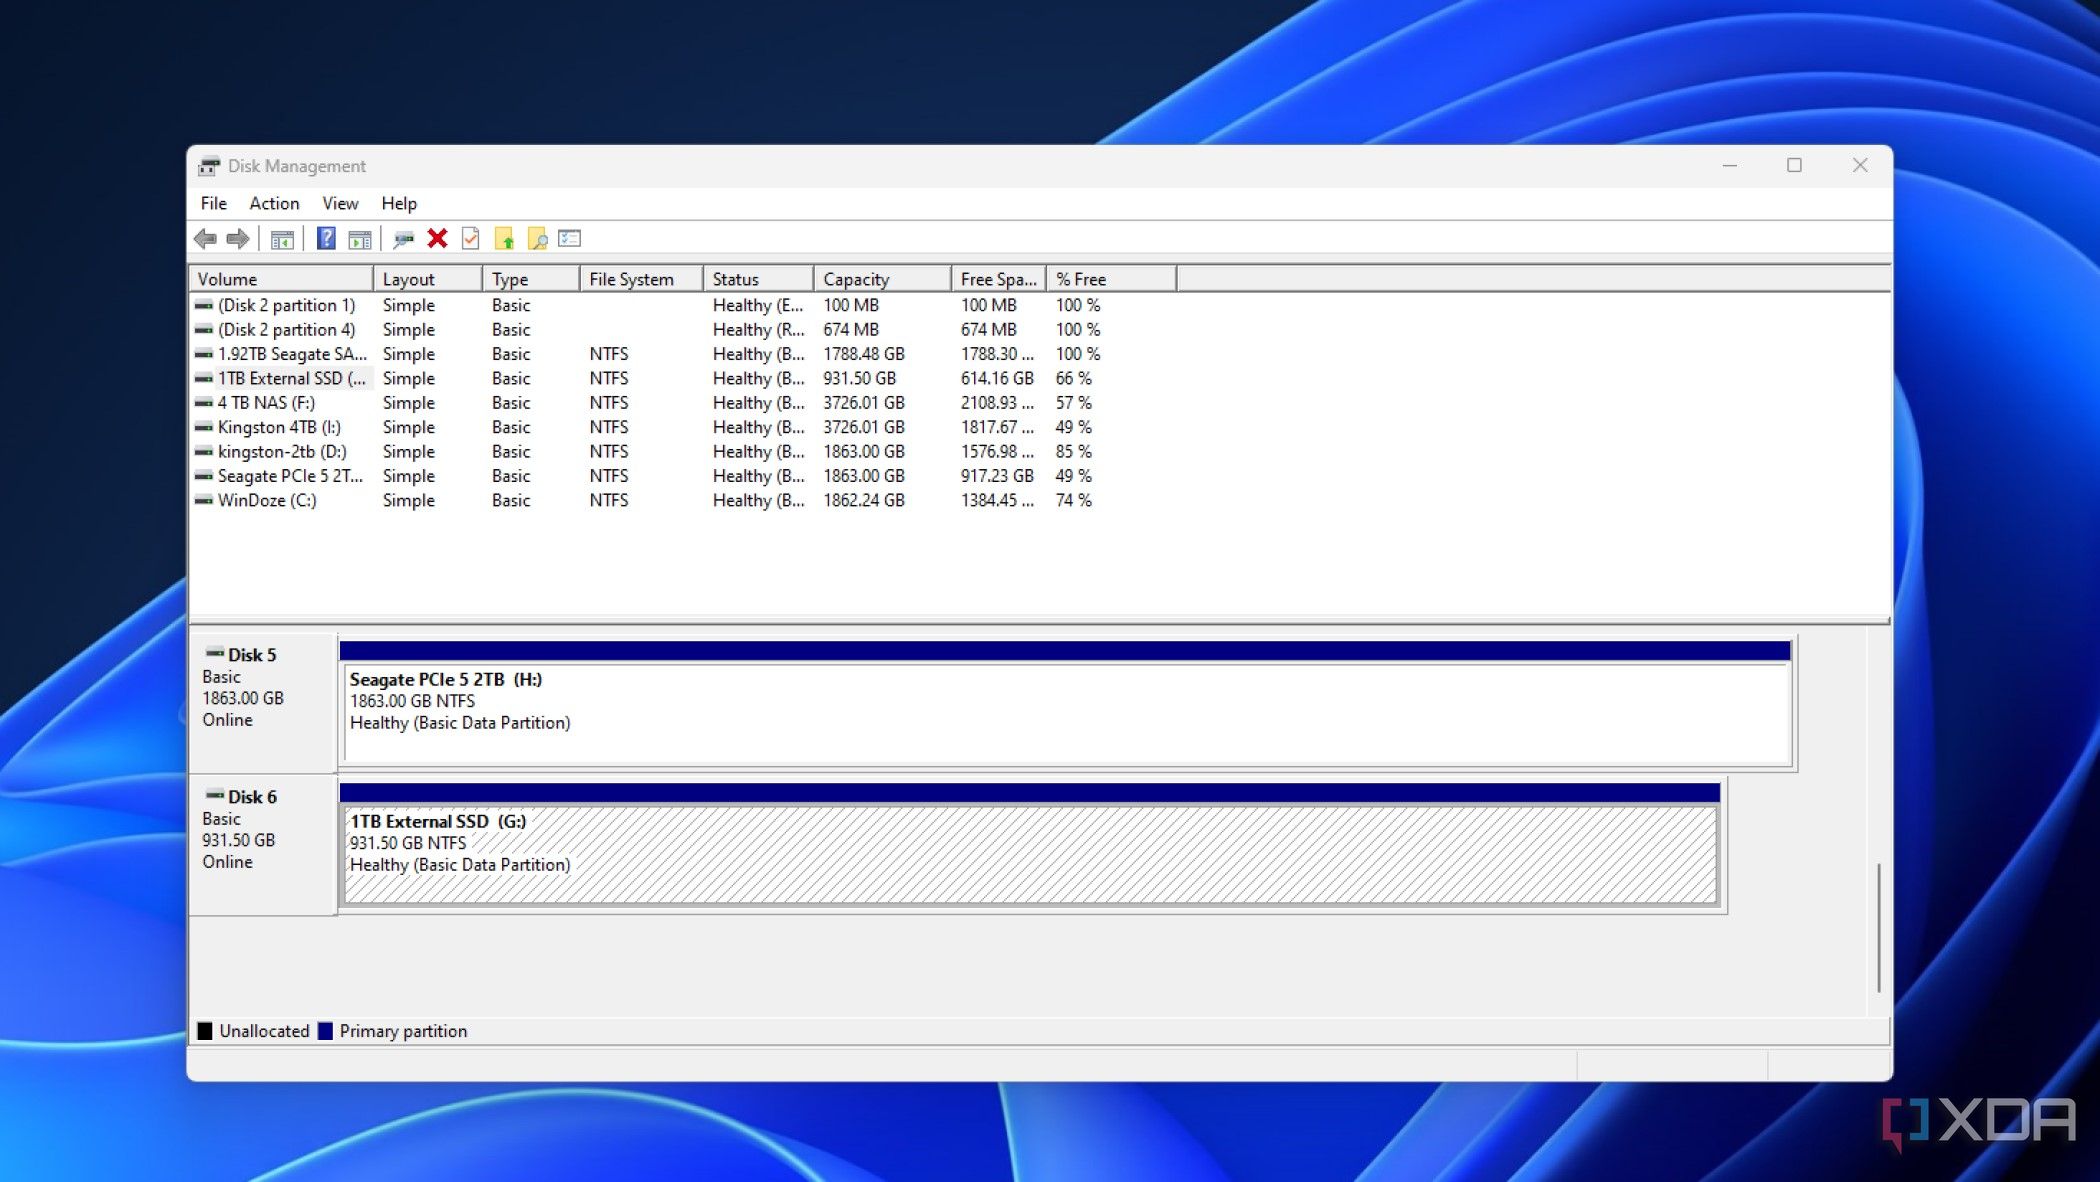
If your external hard drive is showing up in this list, that’s good news, because even if it doesn’t have a partition assigned to it, it only takes a few more steps to get it working correctly again.
Both of the options below will make any data on your external hard drive unrecoverable.
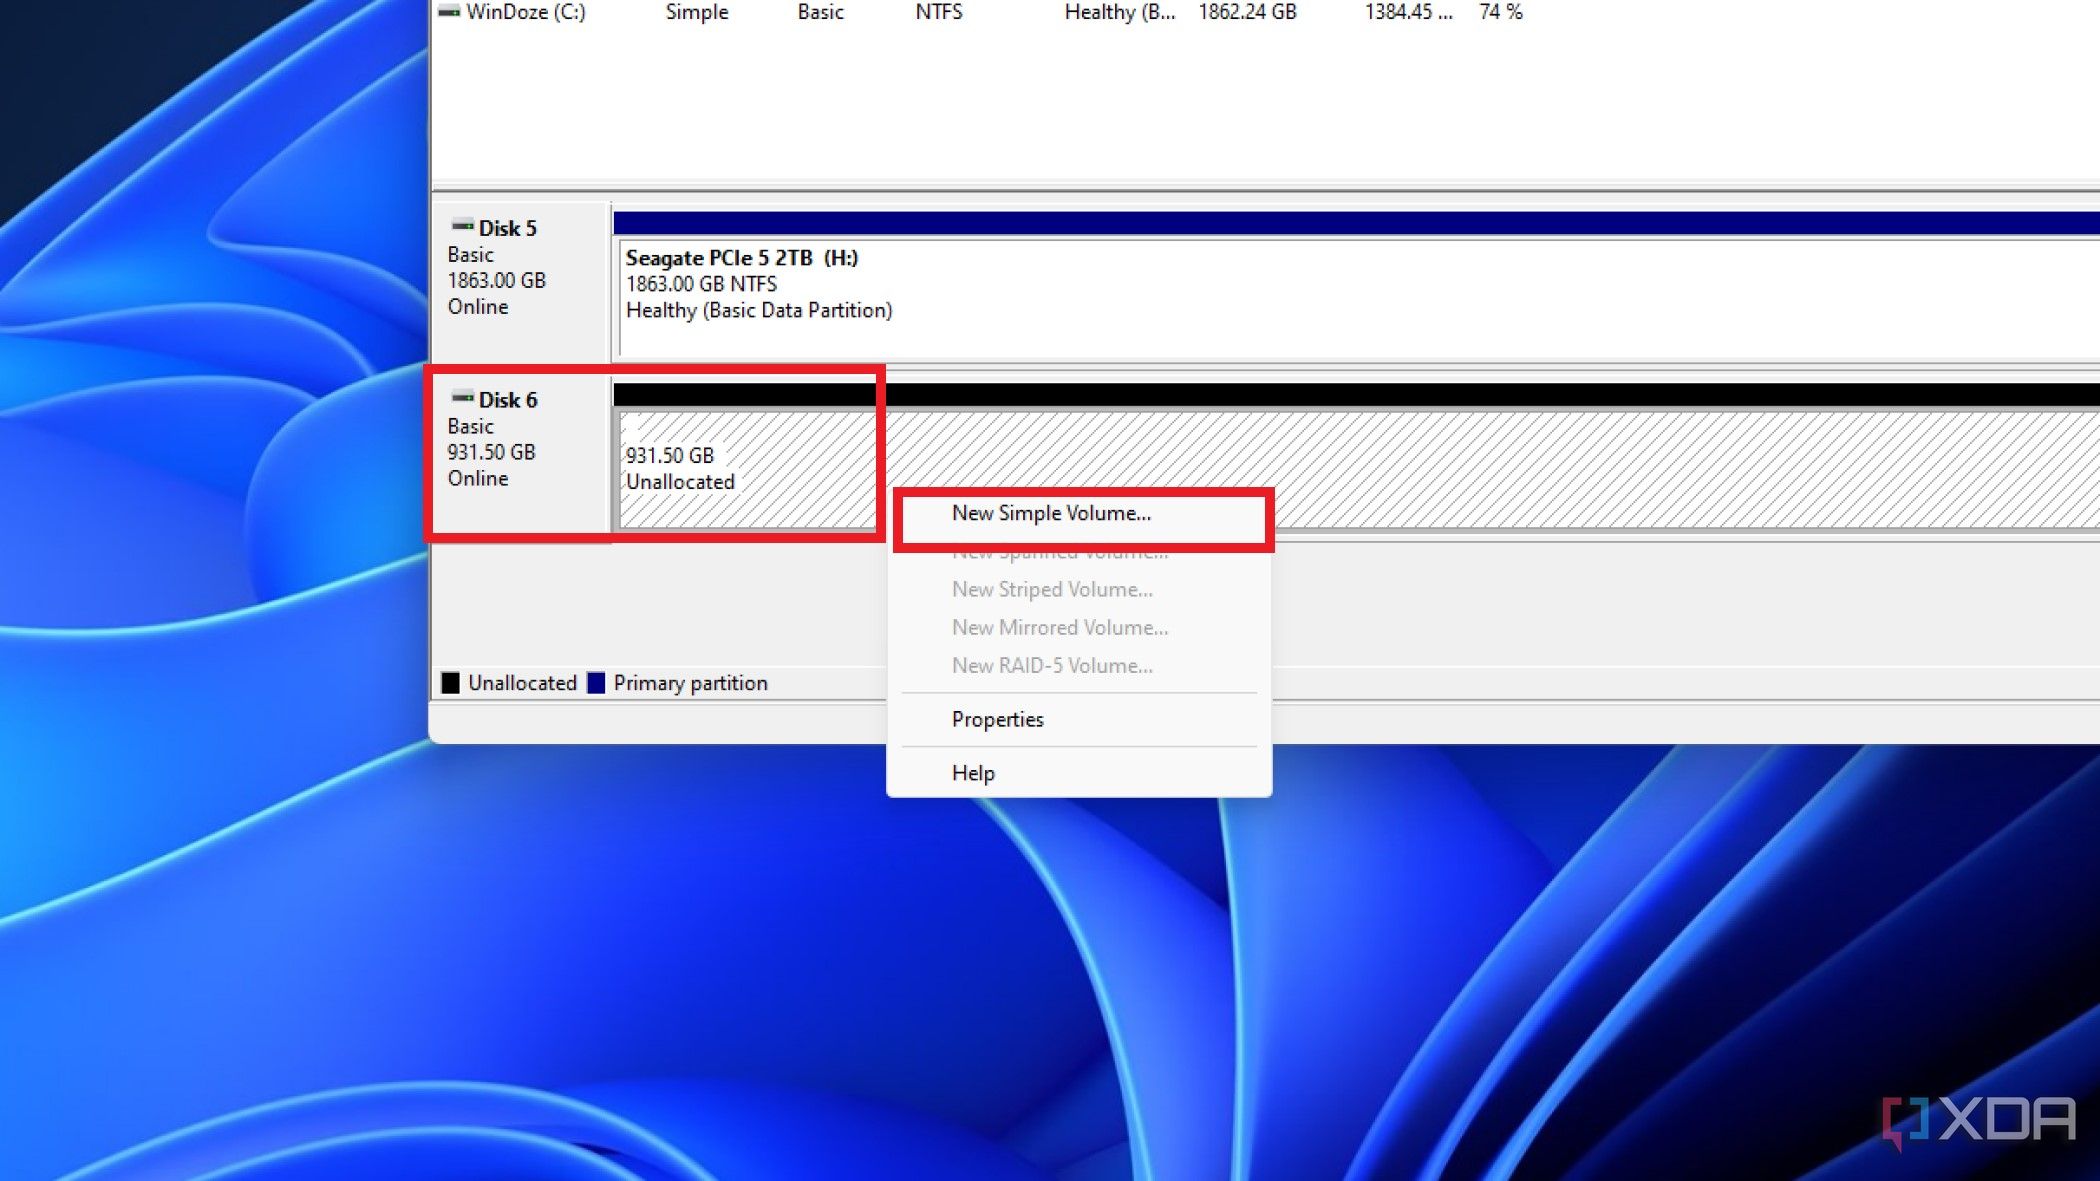
If you see unallocated space:
- Right-click on the drive, and select New Simple Volume.
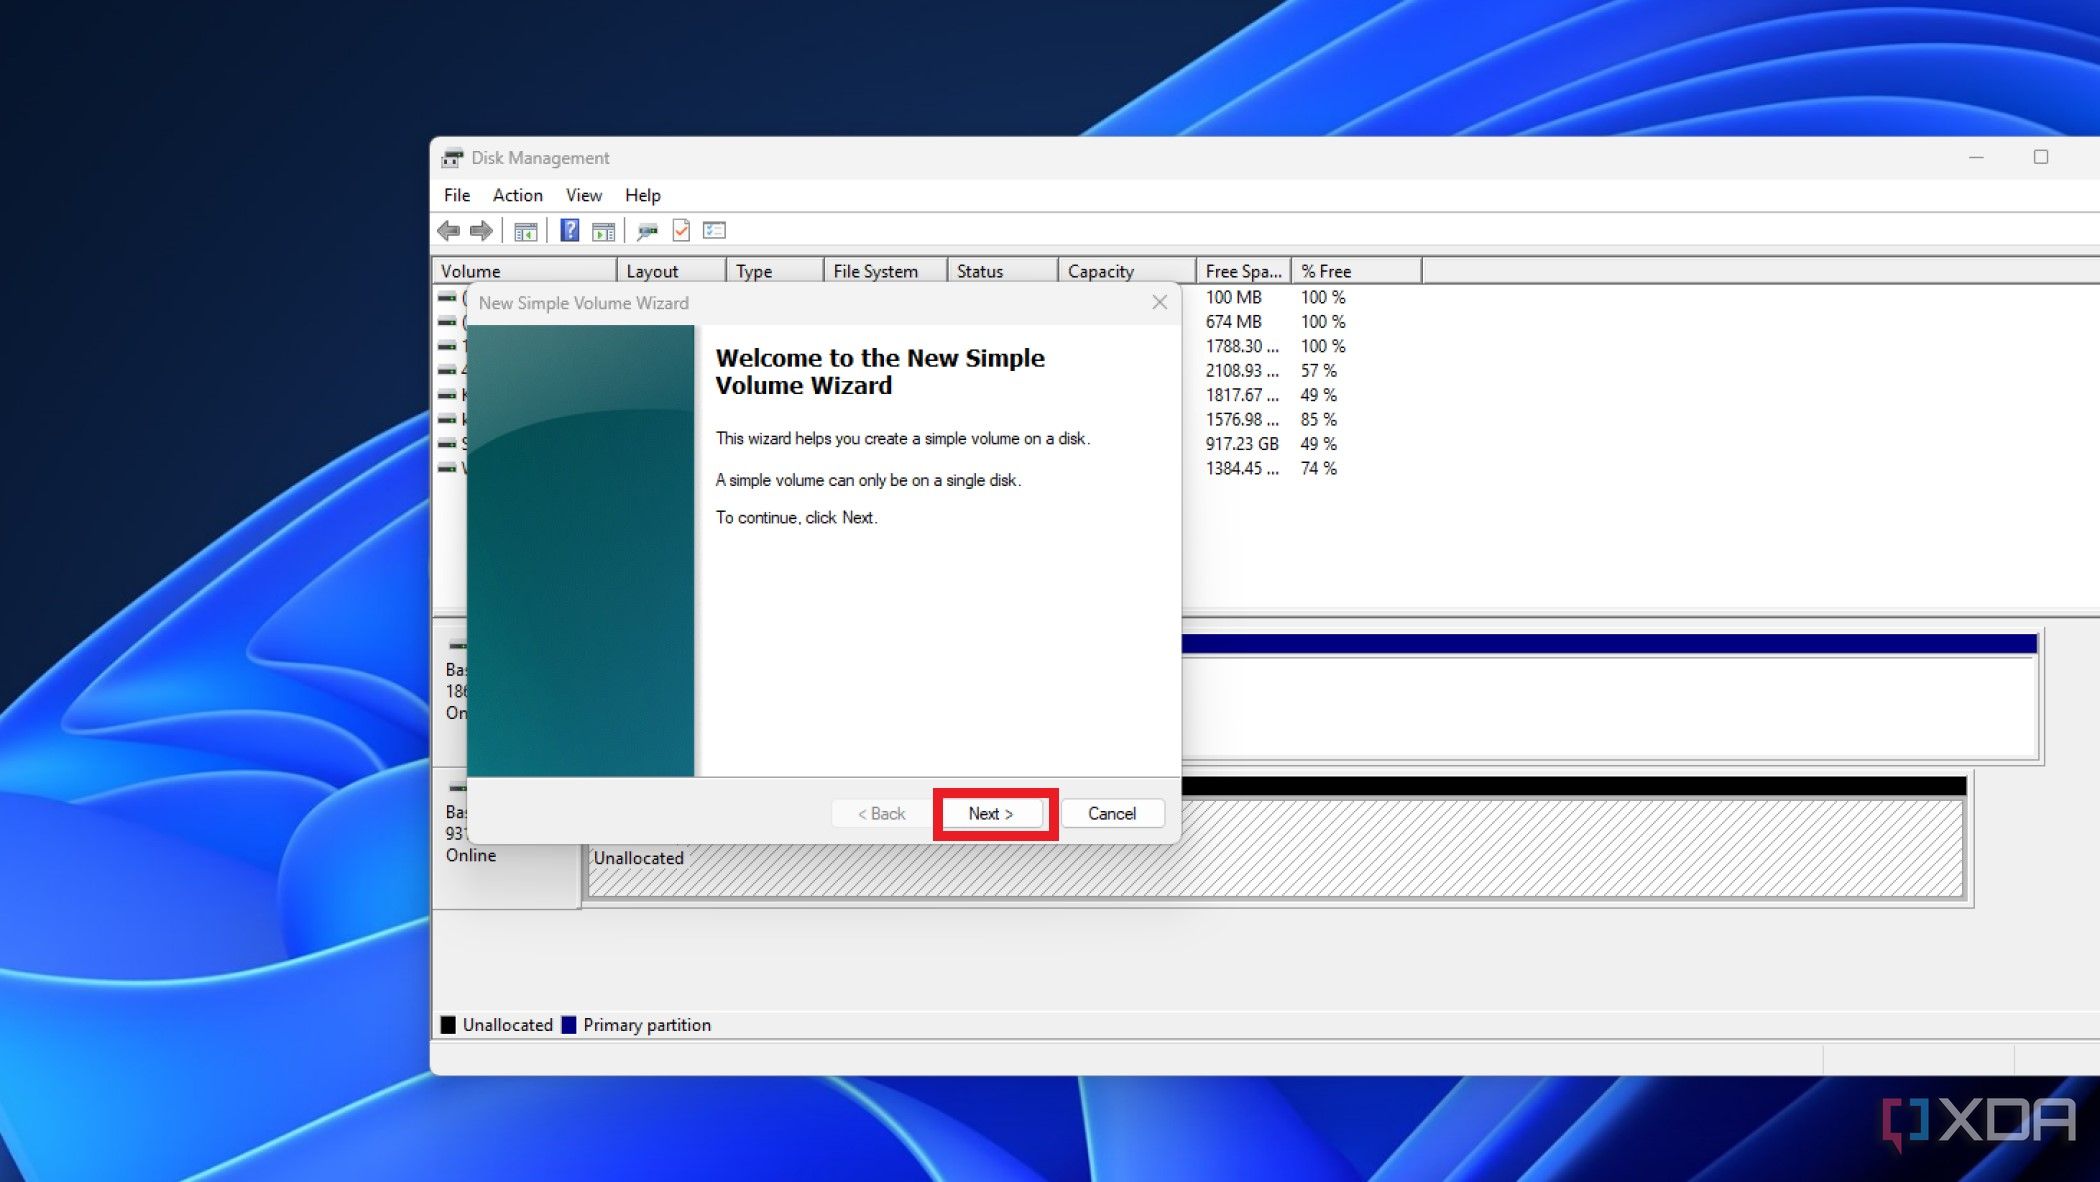
- The New Simple Volume Wizard will pop up. Click on Next to continue.
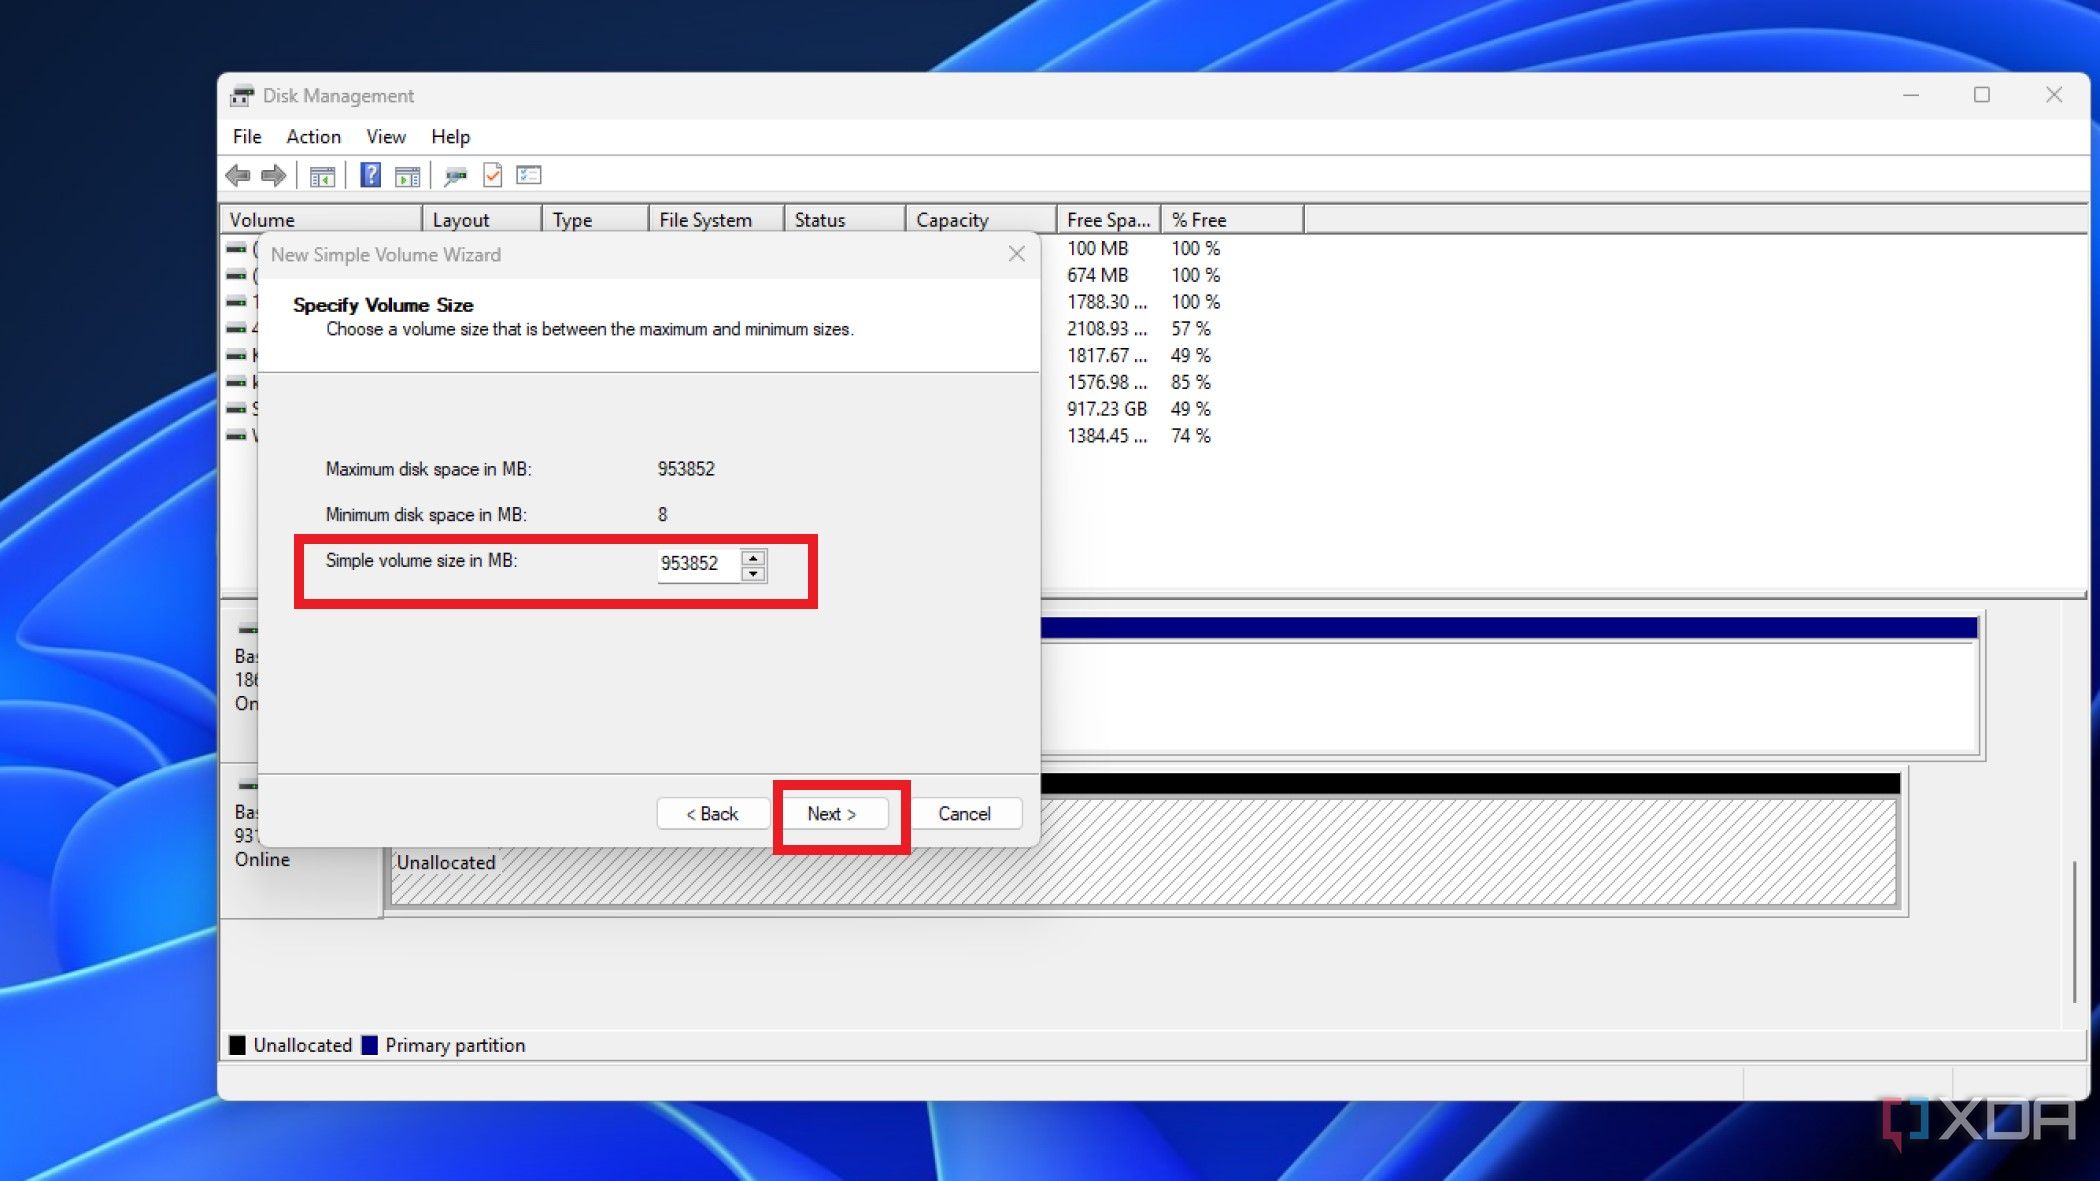
- Specify the volume size in MB. For external drives, this will often be the total capacity of the drive, but you can create multiple volumes if your drive is large enough. Click on Next once done.
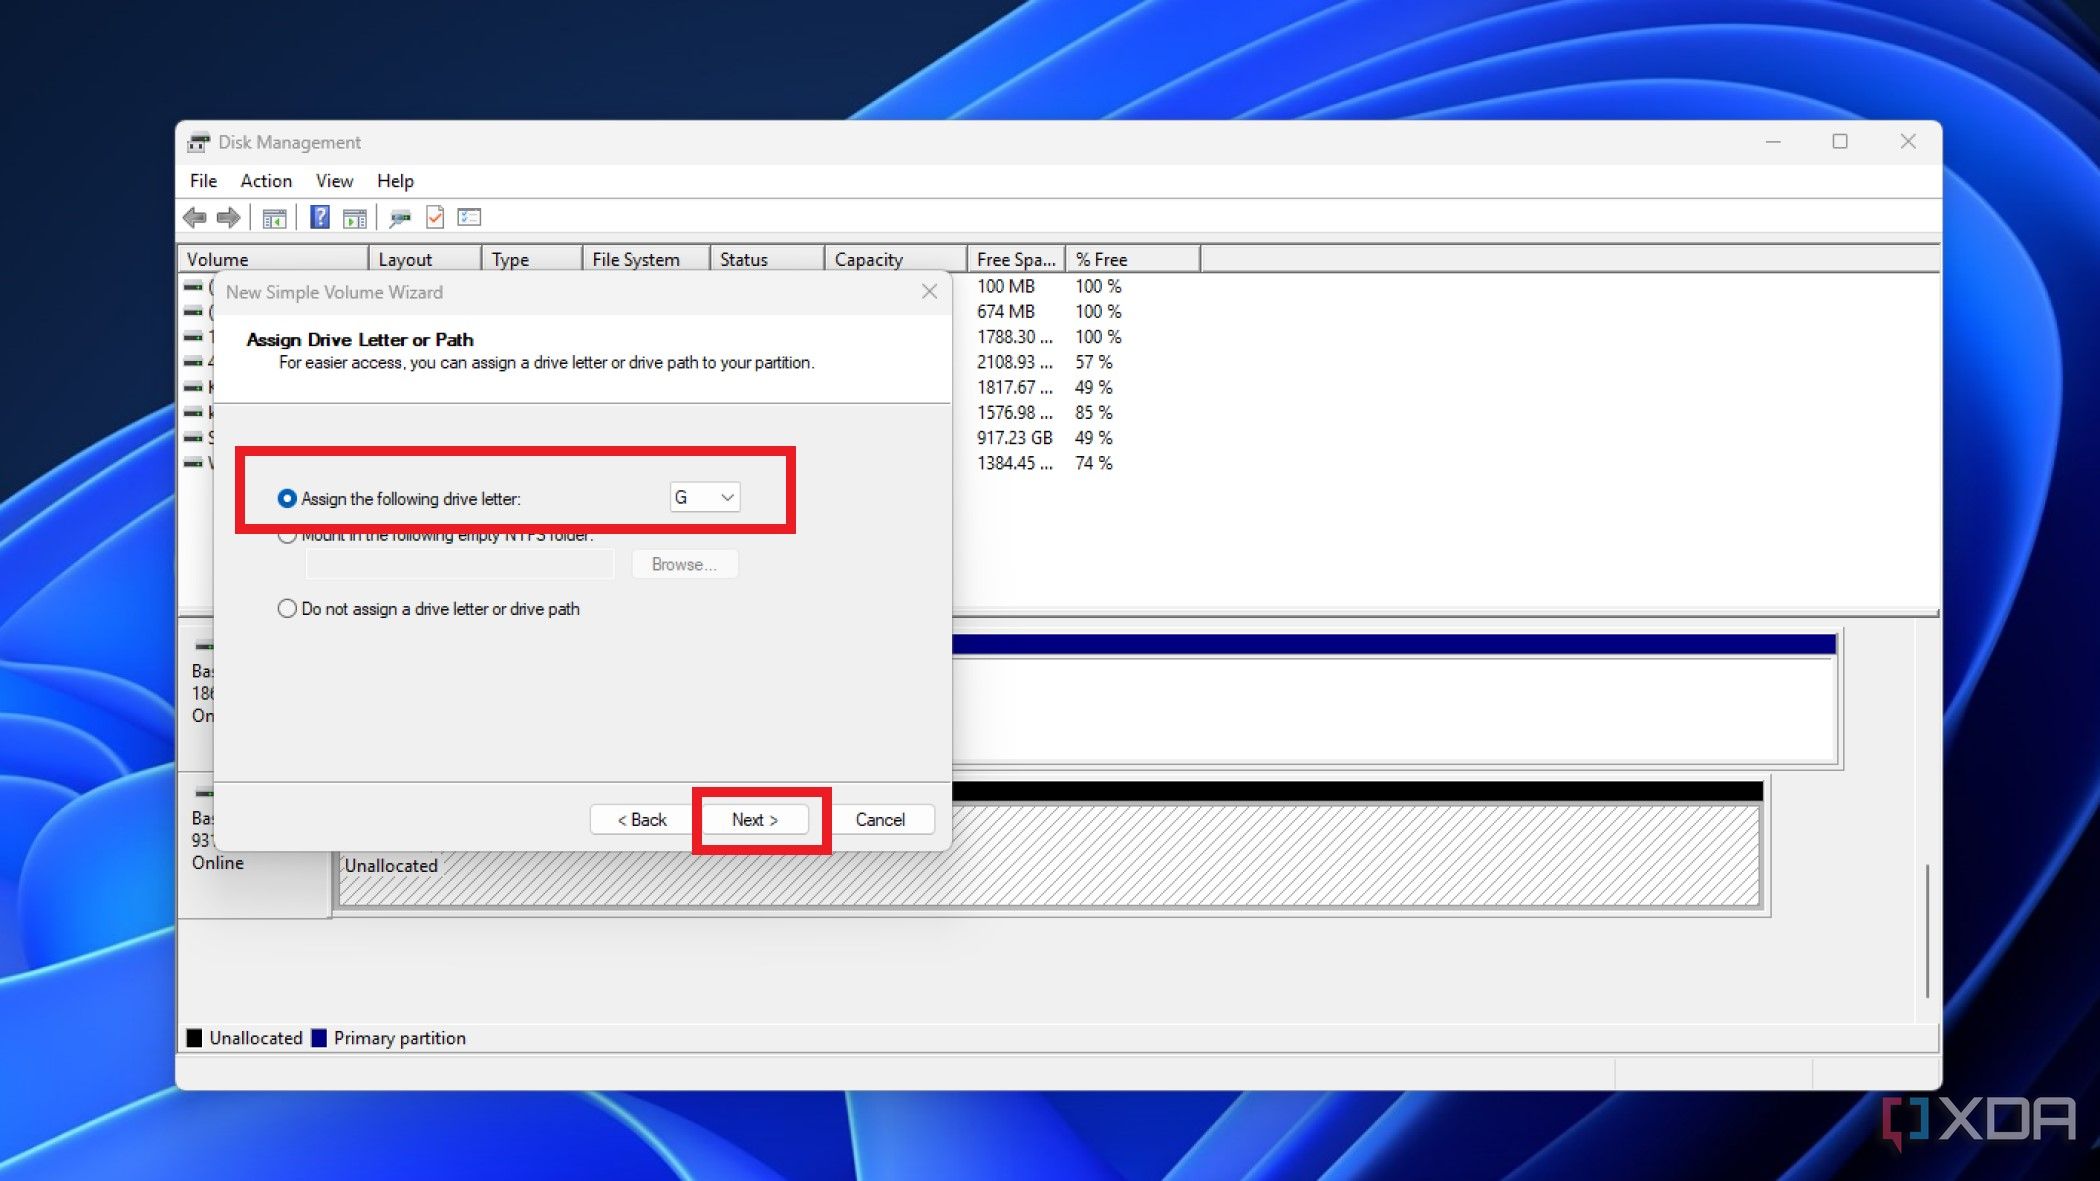
- Assign a drive letter with the top option, then click on Next.
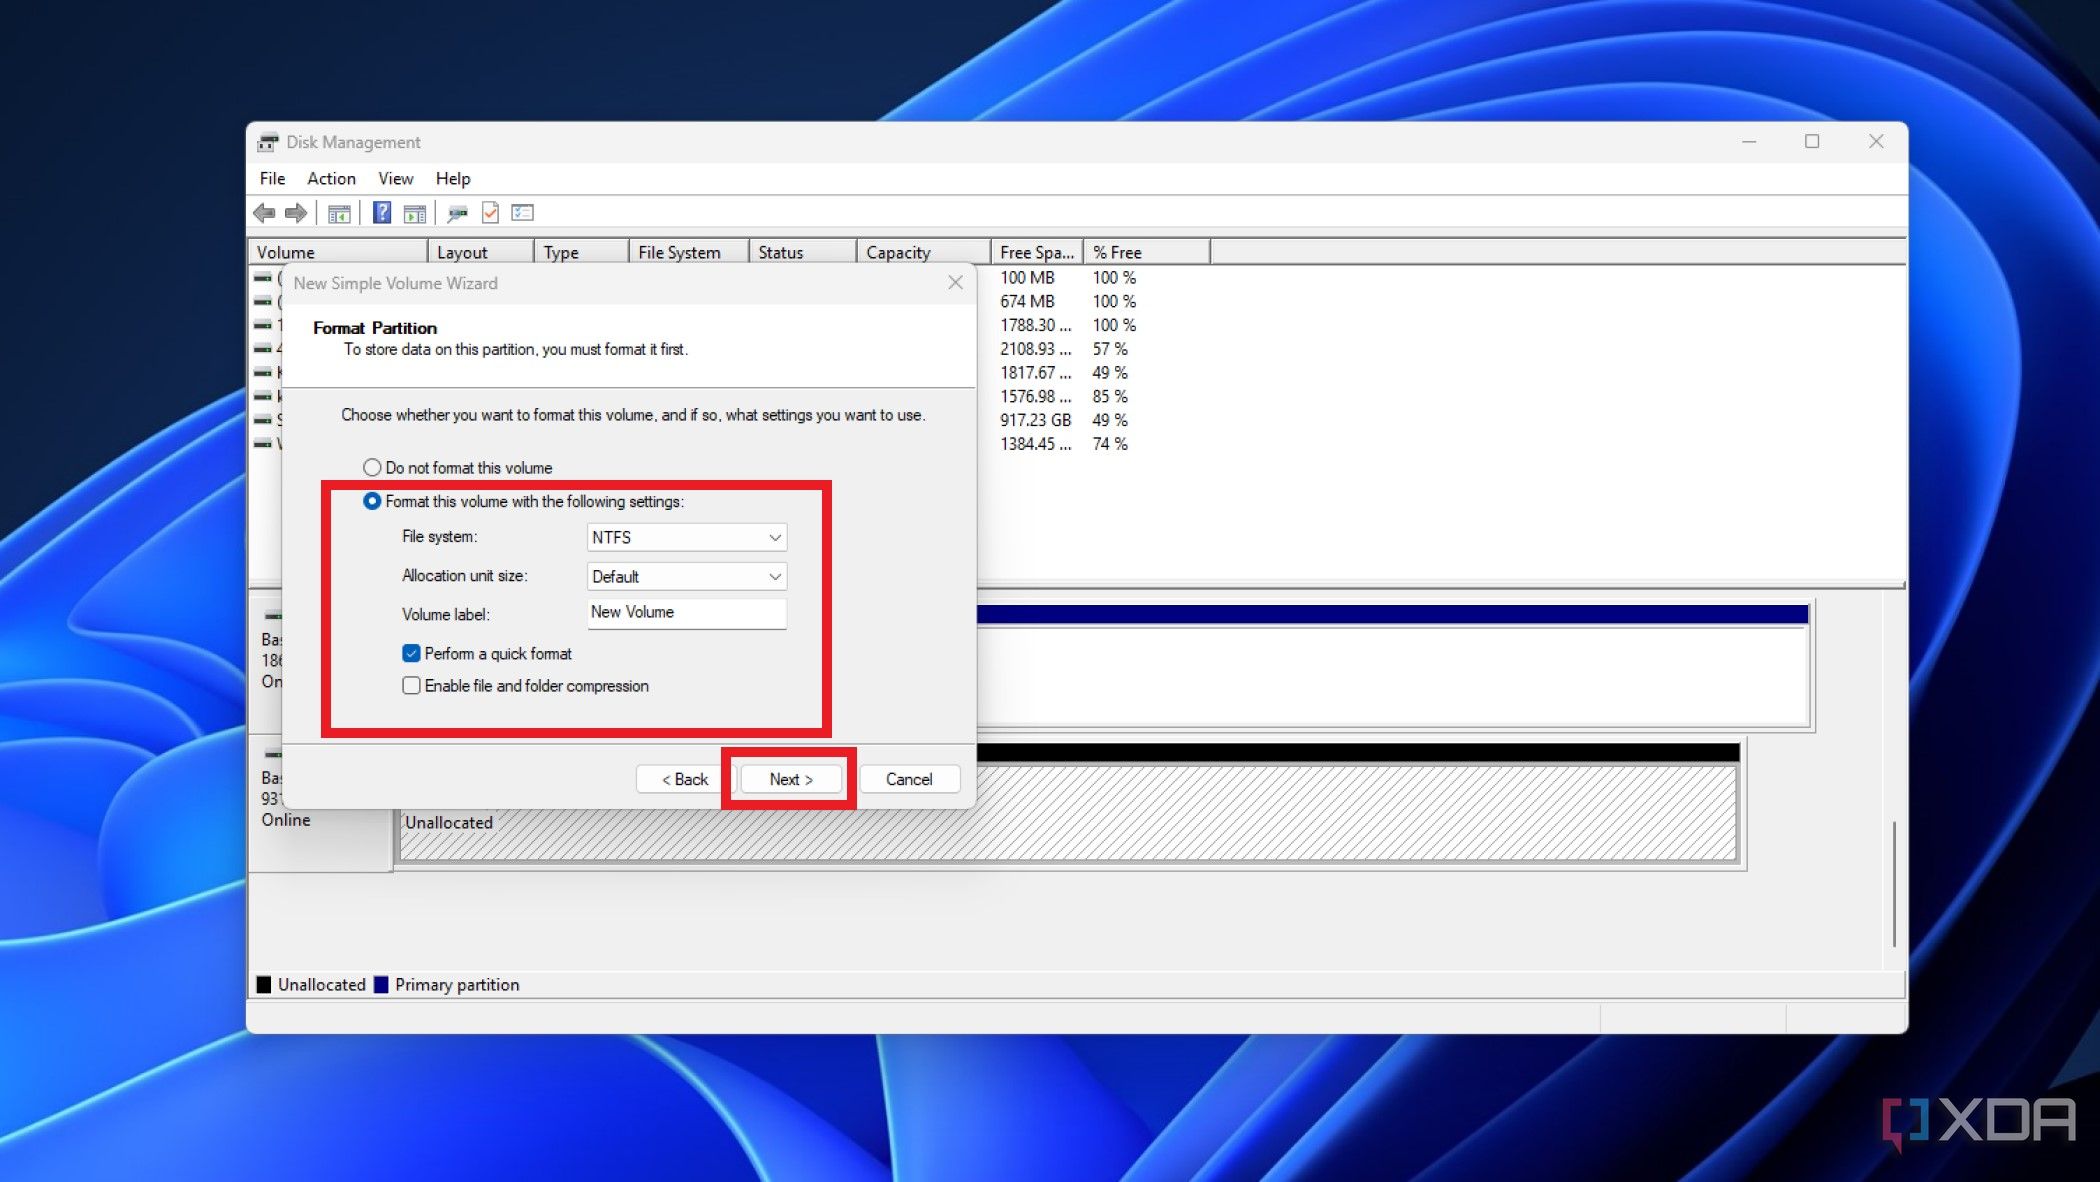
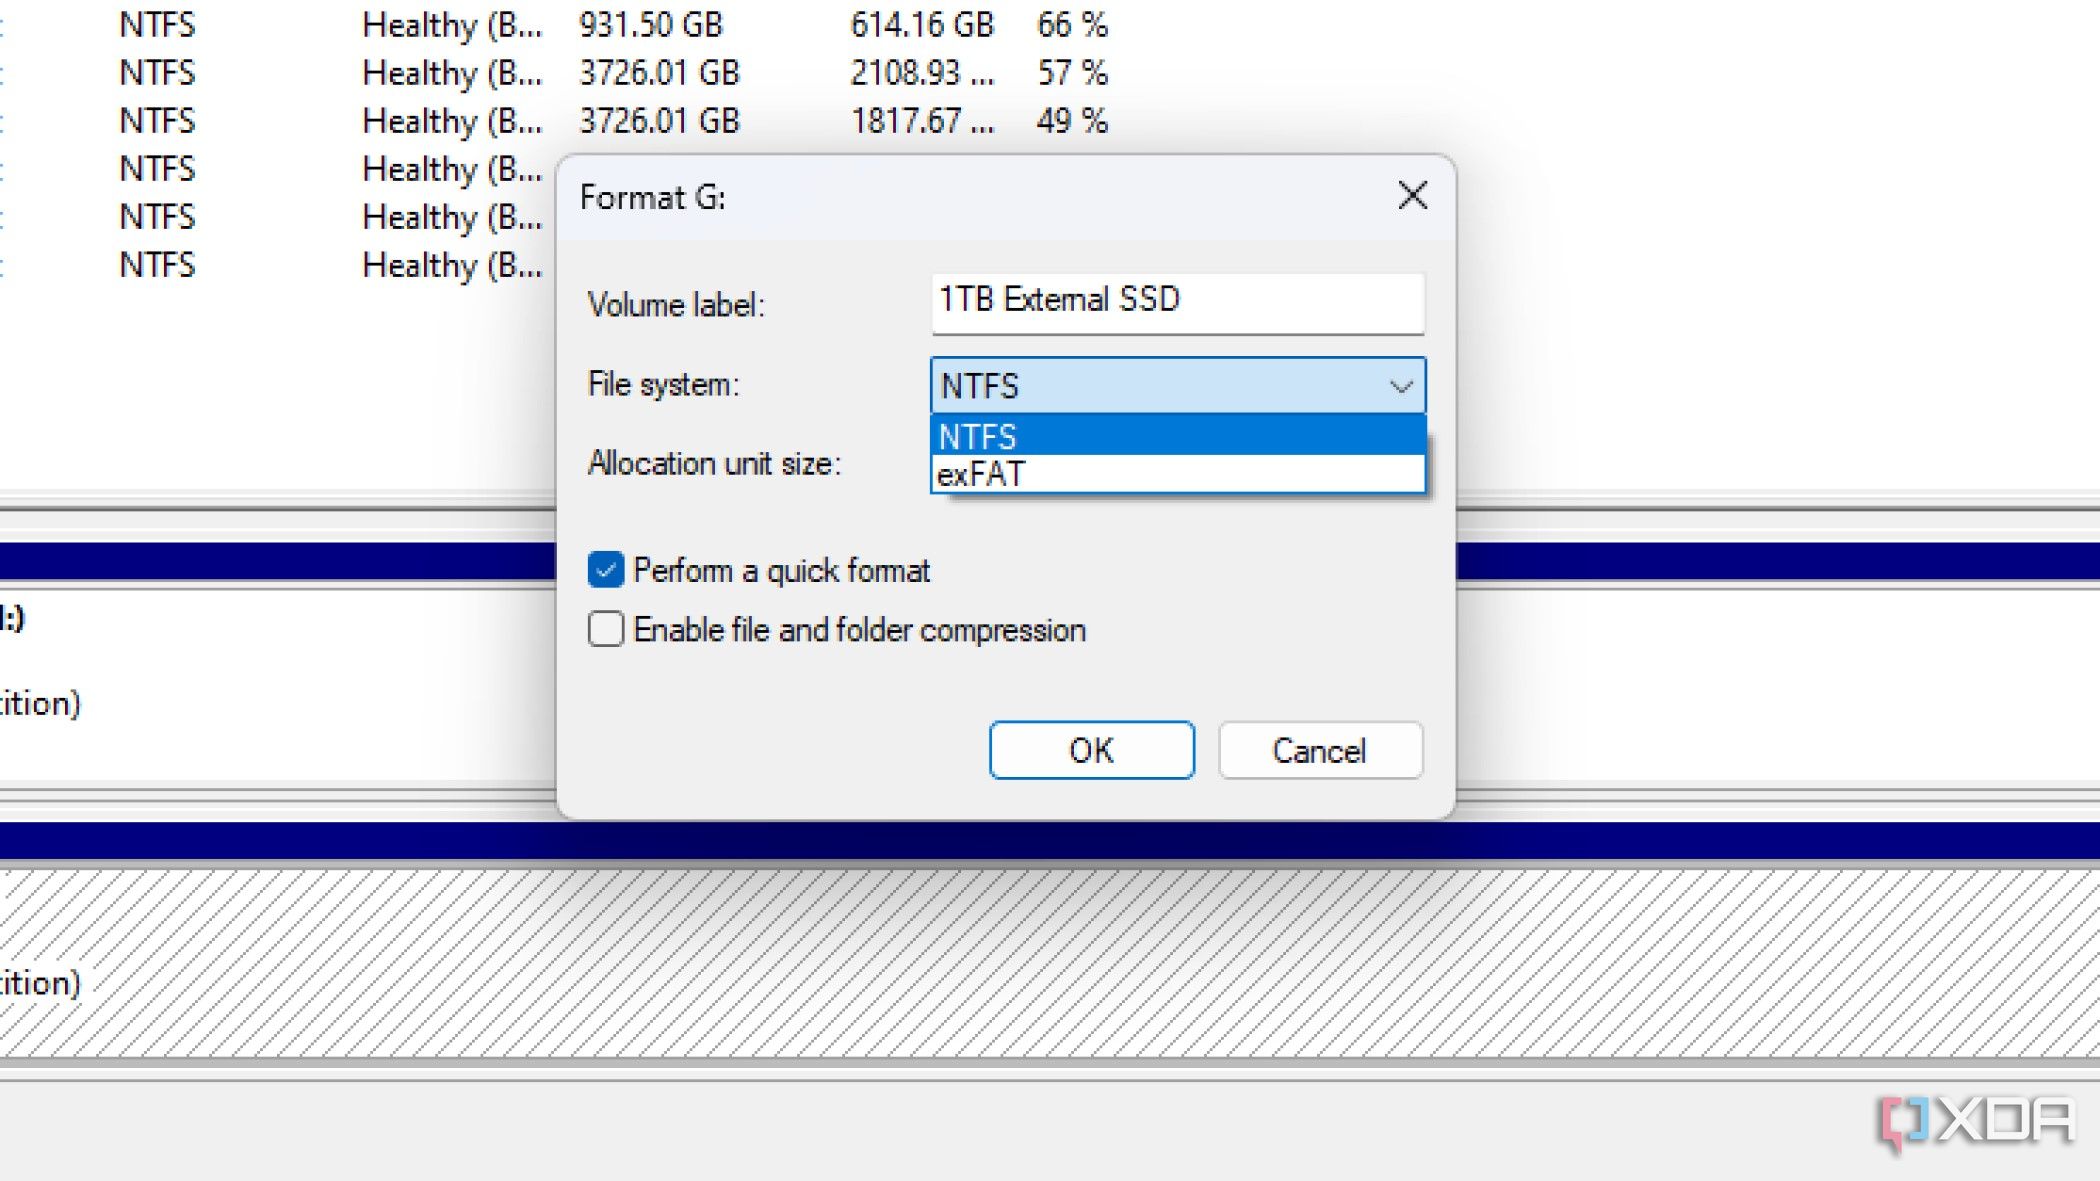
- Finalize the volume by choosing the settings that make the most sense for your external drive. You can use NTFS if you only use Windows computers, or exFAT for cross-platform usage. Leave Allocation unit size as Default, and put your own Volume label in if you want, then click on Next.
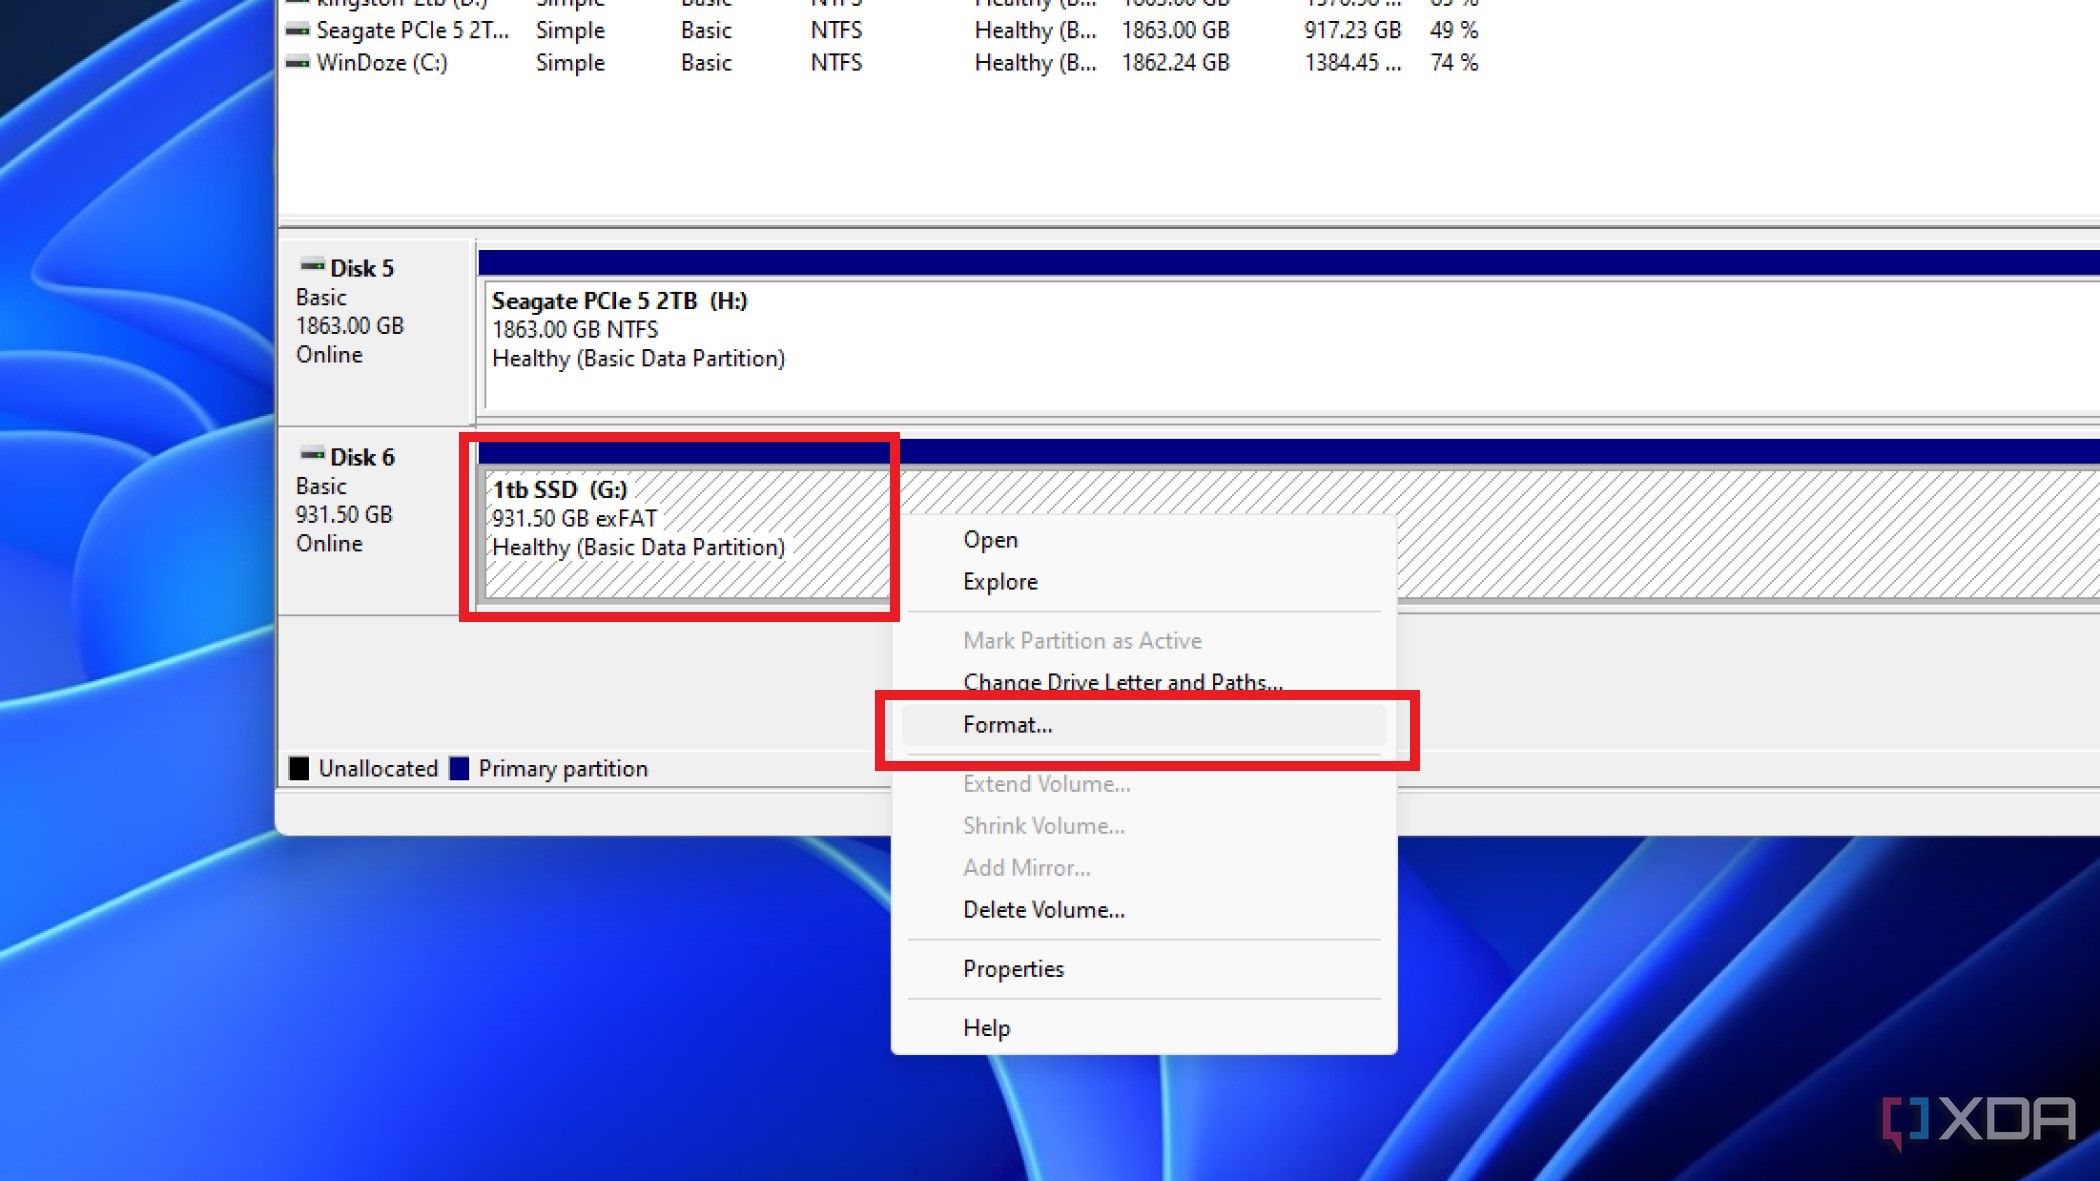
If your drive is showing a volume but not showing up in File Explorer:
- Right-click on the drive and select Format.
- Select the settings you want for formatting the entire drive, and click on OK.
Once Windows finishes adding the volume or formatting the external drive, it will pop up a File Explorer window showing that new volume. As long as your drive isn’t physically damaged, it should now be good to go.
Which file system should I choose for my external drive
When formatting your external drive, the file system choice can be informed by the size of the drive. Smaller flash drives are likely to come as FAT32 from the factory, but that can cause issues as it has a maximum file size of 4GB. If you are formatting your flash drive before use anyway, it’s worth changing the file system to the newer exFAT. The only time you’d used the older FAT32 is if you need compatibility with older devices, like the PlayStation 3. Otherwise, use exFAT for most external drives as it has the widest compatibility with devices, and is especially handy if you switch between Windows and Mac computers on a regular basis.
If you only use Windows machines with your external drive, there’s no reason not to use NTFS when you format your drive, there’s no strict file size limit there. While many devices won’t be able to read it, that doesn’t matter if you only use Windows, it will work well overall with PC usage.
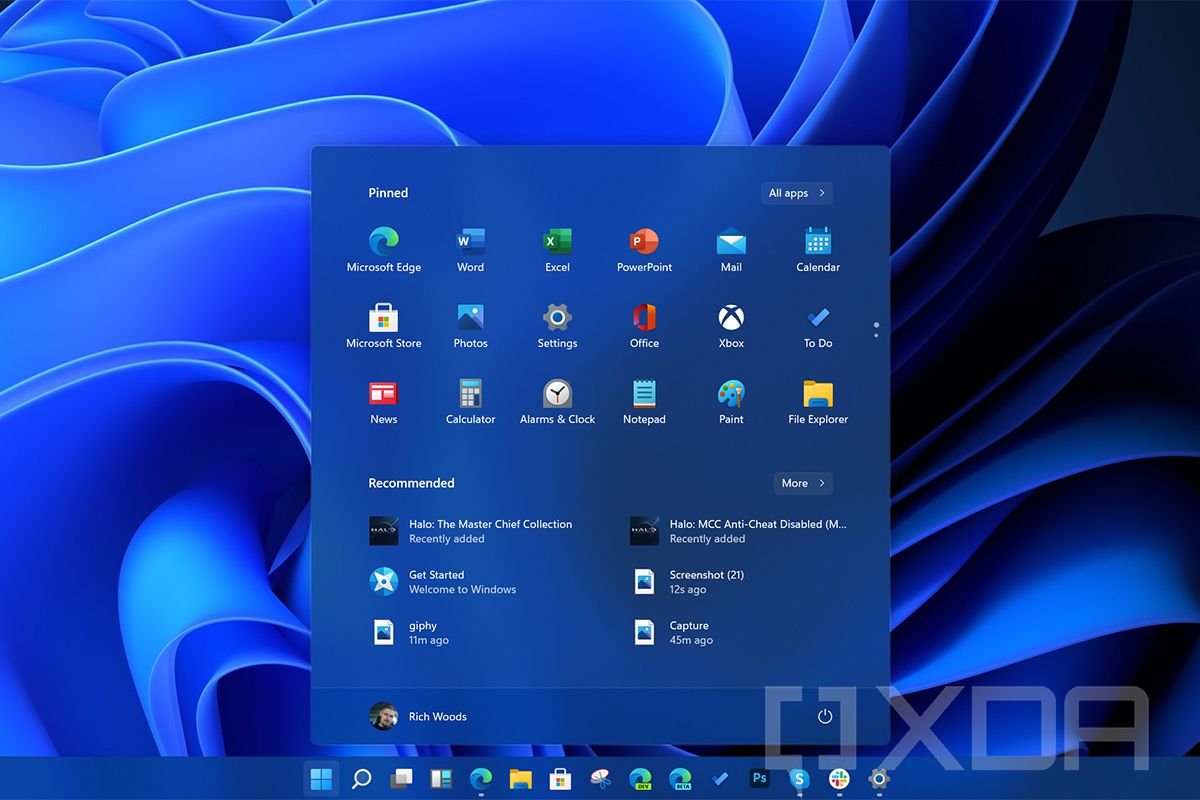
Unable to click on the Start menu? Or has it simply disappeared? Get your Windows install working again with these handy tips.
It’s always a good time to make another data backup for your drive
While you can likely get your data back using many of these fixes for when an external drive isn’t showing up, a few of them will remove all the data on the drive. Since external drives are often used to expand the storage capacity of mobile devices, or to offload files from a PC, that could mean losing precious data. It’s worth regularly backing up that data, either to your computer, or a NAS, or to a cloud storage provider. That way, if anything serious does happen to your external drive, you won’t lose important data.


