
Securely erase your data for a fresh start
Whether you’re selling your computer or need more storage, knowing how to clear a hard drive is essential. Windows and macOS have handy built-in tools to format internal and external hard drives efficiently and securely.
In this guide, we’ll walk you through the simple steps to clear a hard drive.
Tools and requirements
- Windows or Mac computer
- External storage
Steps for how to clear a hard drive on Windows 11
- Press Windows + E to open the File Explorer.
- Click This PC.
- Right-click the hard drive you want to clear.
- Click Format.
- Click Start.
Step by step guide to clear a hard drive on Windows 11
The steps for clearing internal and external hard drives are the same, but below, we only demonstrate steps to clear a hard drive that doesn’t have Windows installed on it.
1. Launch File Explorer > This PC
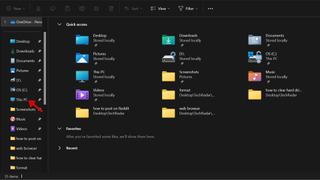
Start by pressing Windows + E to launch the File Explorer. On the left-hand panel, click This PC.
2. Right-click the hard drive you want to clear
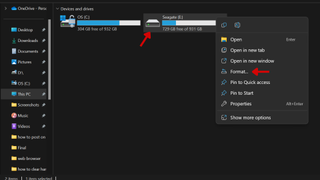
Right–click the drive you want to clear and click Format. If you want to clear an external hard drive, ensure it’s connected to the computer.
3. Tick/Untick the Quick Format box and click Start
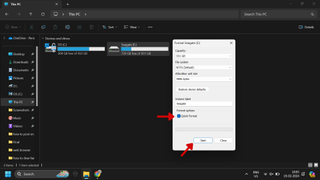
Tick or untick the Quick Format box based on your requirements.
Unticking the Quick Format box will ensure the drive is thoroughly wiped (data is overwritten), and although it’s more secure, it takes time. A quick format will swiftly clear the drive for you, but it won’t overwrite your data like the previous method, making it less secure.
Once you’re ready, click Start.
Steps for how to clear a hard drive on macOS
- Launch Disk Utility.
- Click the hard drive (left sidebar).
- Click Erase.
- Choose a Format and Security Options.
- Click Erase and then click Done.
Step by step guide to clear a hard drive on macOS
Below, we only demonstrate steps to clear an external hard drive on macOS. To clear internal hard drives on your Mac, read our guide on how to reset a Mac.
LATEST VIDEOS FROM techradar
1. Launch Disk Utility
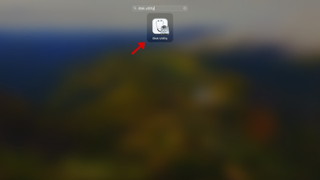
Launch the Disk Utility app after connecting the external storage to your Mac.
2. Select the hard drive and click Erase
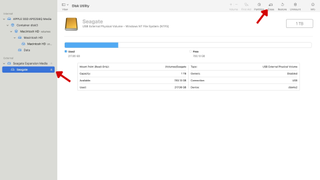
Click the hard drive under External in the left sidebar. Then, click Erase, which is towards the top right.
3. Choose a Format and Security Options > Erase
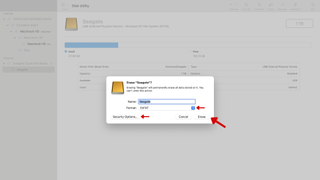
Select a Format and Security Options to decide between a swift erase or a slow but secure wipe that can’t be recovered.
Once ready, click Erase and then click Done.
Final Thoughts
Clearing your hard drive is an effective way to ensure your data is securely wiped. Along with creating more room for your files, the additional storage can add an impressive boost to your system (or storage device) for optimal performance.